Posts in Garden
Antipasto Appetizer Skewers
Antipasto Tortellini Skewers, Recipe from Half Baked Harvest

Antipasto Tortellini Skewers, Recipe from Half Baked Harvest

This is a great summer appetizer, that is both tasty and dramatic. Also suitable for an easy summer lunch, adding a simple green salad and a slice of rustic country bread or focaccia. You can mix up the ingredients according to your taste! Perfect for utilizing your ripe cherry tomatoes and fragrant Italian basil from your summer garden. Make your own pesto, or buy your favorite.

Just like lasagna and layering, once you assemble your “mise en place,” the skewers go very quickly. Save some time, assemble a day ahead, store in the refrigerator. When ready to serve bring the skewers to room temperature, place on your serving platter, add a bit of garnish, and drizzle a little of your pesto over the skewers.

This recipe is lovingly adapted from Tieghan Gerard at Half Baked Harvest. This is simply a recipe you “can make it your own,” adding this or deleting that. What is recommended is a nice variety of ingredients that can stay on a skewer well. Enjoy!

More Related Links:

24 Carrot Gold

Bon Appétit et Bon Weekend…Bonnie

Tomato Tune Up

Tomato Plants Growing Near Potting Shed

I missed the boat on sowing tomato seeds this past February. I did have the chance to round up all of my volunteer tomato seedlings coming up from compost use throughout the garden and transplanted them all in raised beds in my potager. Interestingly, most of these volunteer tomato seedlings are Roma tomatoes.

Green Thumb Nursery in San Marcos, California always has a nice selection of tomato and vegetable seedlings in six packs late spring into summer. I bought six packs of Celebrity, Early Girl, Cherry Red, and Cherokee Purple. Much more than I usually plant, but this year I really wanted to have an abundance of tomatoes.

Out of room in my potager, I planted the six pack seedlings in a row near my potting shed, using a curly rod for support that I initially saw in Provence, Tomato Staking Technique. I haven’t looked recently, but I got my stakes at Dixieline Lumber, and I have seen them at Home Depot. As my tomato plants grow I wrap them carefully around the stakes, and also use gardener’s green tape for more security. For irrigation, and with my sandy soil, I installed a versatile 1/4” soaker hose, you can find at Home Depot, which has worked well.

Back to Basics.

1) Fertilize your tomato plants when they begin to flower, and monthly or more thereafter. I use GroPower Plus fertilizer, available at local Grangetto’s.

2) Water your tomato plants to 1” deep, and as frequently needed, if you have sandy or clay soil. Do not let your plants dry out and wilt, and do not over water when summer hot spells hit.

3) Tomato plants thrive with heat and sun, at least 6 hours or more. If you are coastal, tomato plants don’t really like ocean breezes and benefit from a protected sunny spot around your home that shields your tomato plants, possibly incorporating a house wall or fence. My west hedge and macadamia trees give my row of tomato plants some shielding.

4) Keep your tomato plants cleaned up, off of the ground, and opened up for air circulation and sunlight.

5) Indeterminate tomato varieties have a vining tendency. They can produce fruit until the plant is killed by frost. They bloom, set fruit, and ripen fruit all at the same time. These varieties need staking, and attention to removing suckers off of their main stem.

6) Determine tomato varieties are also called bush type, and are compact in form. They stop growing when fruit sets on their top bud. Their crop ripens all at once within a two-week period, and then the plant dies off. Ideal for use in containers, and don’t require staking, or pinching, and trimming of suckers.

7) Heirloom tomatoes or open pollinated varieties are generally considered 50 years or older, produce a true seed every year, and are known for their outstanding tomato flavors.

8) Hybrid tomato varieties are created from seeds produced by different plants that were crossed with each other to obtain certain desired characteristics. These varieties will not produce a true seed, and sometimes these tomatoes are considered to be slightly inferior in flavor and texture.

Years ago I interviewed Del Mar landscape designer, Linda Chisari, who is well known for her vegetable and tomato growing finesse. Linda back then grew over 30 different tomato varieties each year and shared, “the ones that do best for me are varieties that tolerate cool, overcast summer weather.” Linda’s “short list” then, was Juliet and Enchantment for eating fresh or in sauces. Green Zebra for it’s slightly acidic flavor and appearance. Dona, a small yet delicious French variety. Carmello for fabulous taste and appearance. Celebrity is a large flavorful tomato, and great when our summers are warm. Sun Gold, an outstanding orange cherry tomato. Of course, San Marzano for making sauce.

Growing tomatoes is all about preferences. What tomatoes you like to grow, and for what culinary purposes. Where you live and grow your tomatoes, be it coastal or inland, in the ground or in containers. How you prefer to support your tomatoes in your garden. Tomatoes are one of summer’s best experiences, sun-ripened mouth watering homegrown tomatoes, you won’t want to miss out on! Thyme for tomatoes is just around the corner.

Please share your favorite tomato varieties, and how you like to grow them.

Bon Appétit and Bon Weekend….Bonnie

Kitchen Garden Inspiration
The Kitchen Garden at Allt-y-bela in Wales, Garden Design 2012 Magazine

The Kitchen Garden at Allt-y-bela in Wales, Garden Design 2012 Magazine

From my post last week, Down The Garden Path, followers were asking me where I got my willow fencing. I thought it might be fun to revisit the original post and my original kitchen garden inspiration from photos and the Garden Design article. I hunted “high’ and “low” to find willow products, and finally found them at Master Garden Products in the Pacific Northwest. I actually called them as I had several questions and needed more information to make my order. Master Garden Products couldn’t have been more helpful and so friendly. I highly recommend the company and their products.

Now is a great time to get your gardens plans in place, make an order, and enjoy the beauty of willow!

Bon Appétit et Bon Weekend…Bonnie

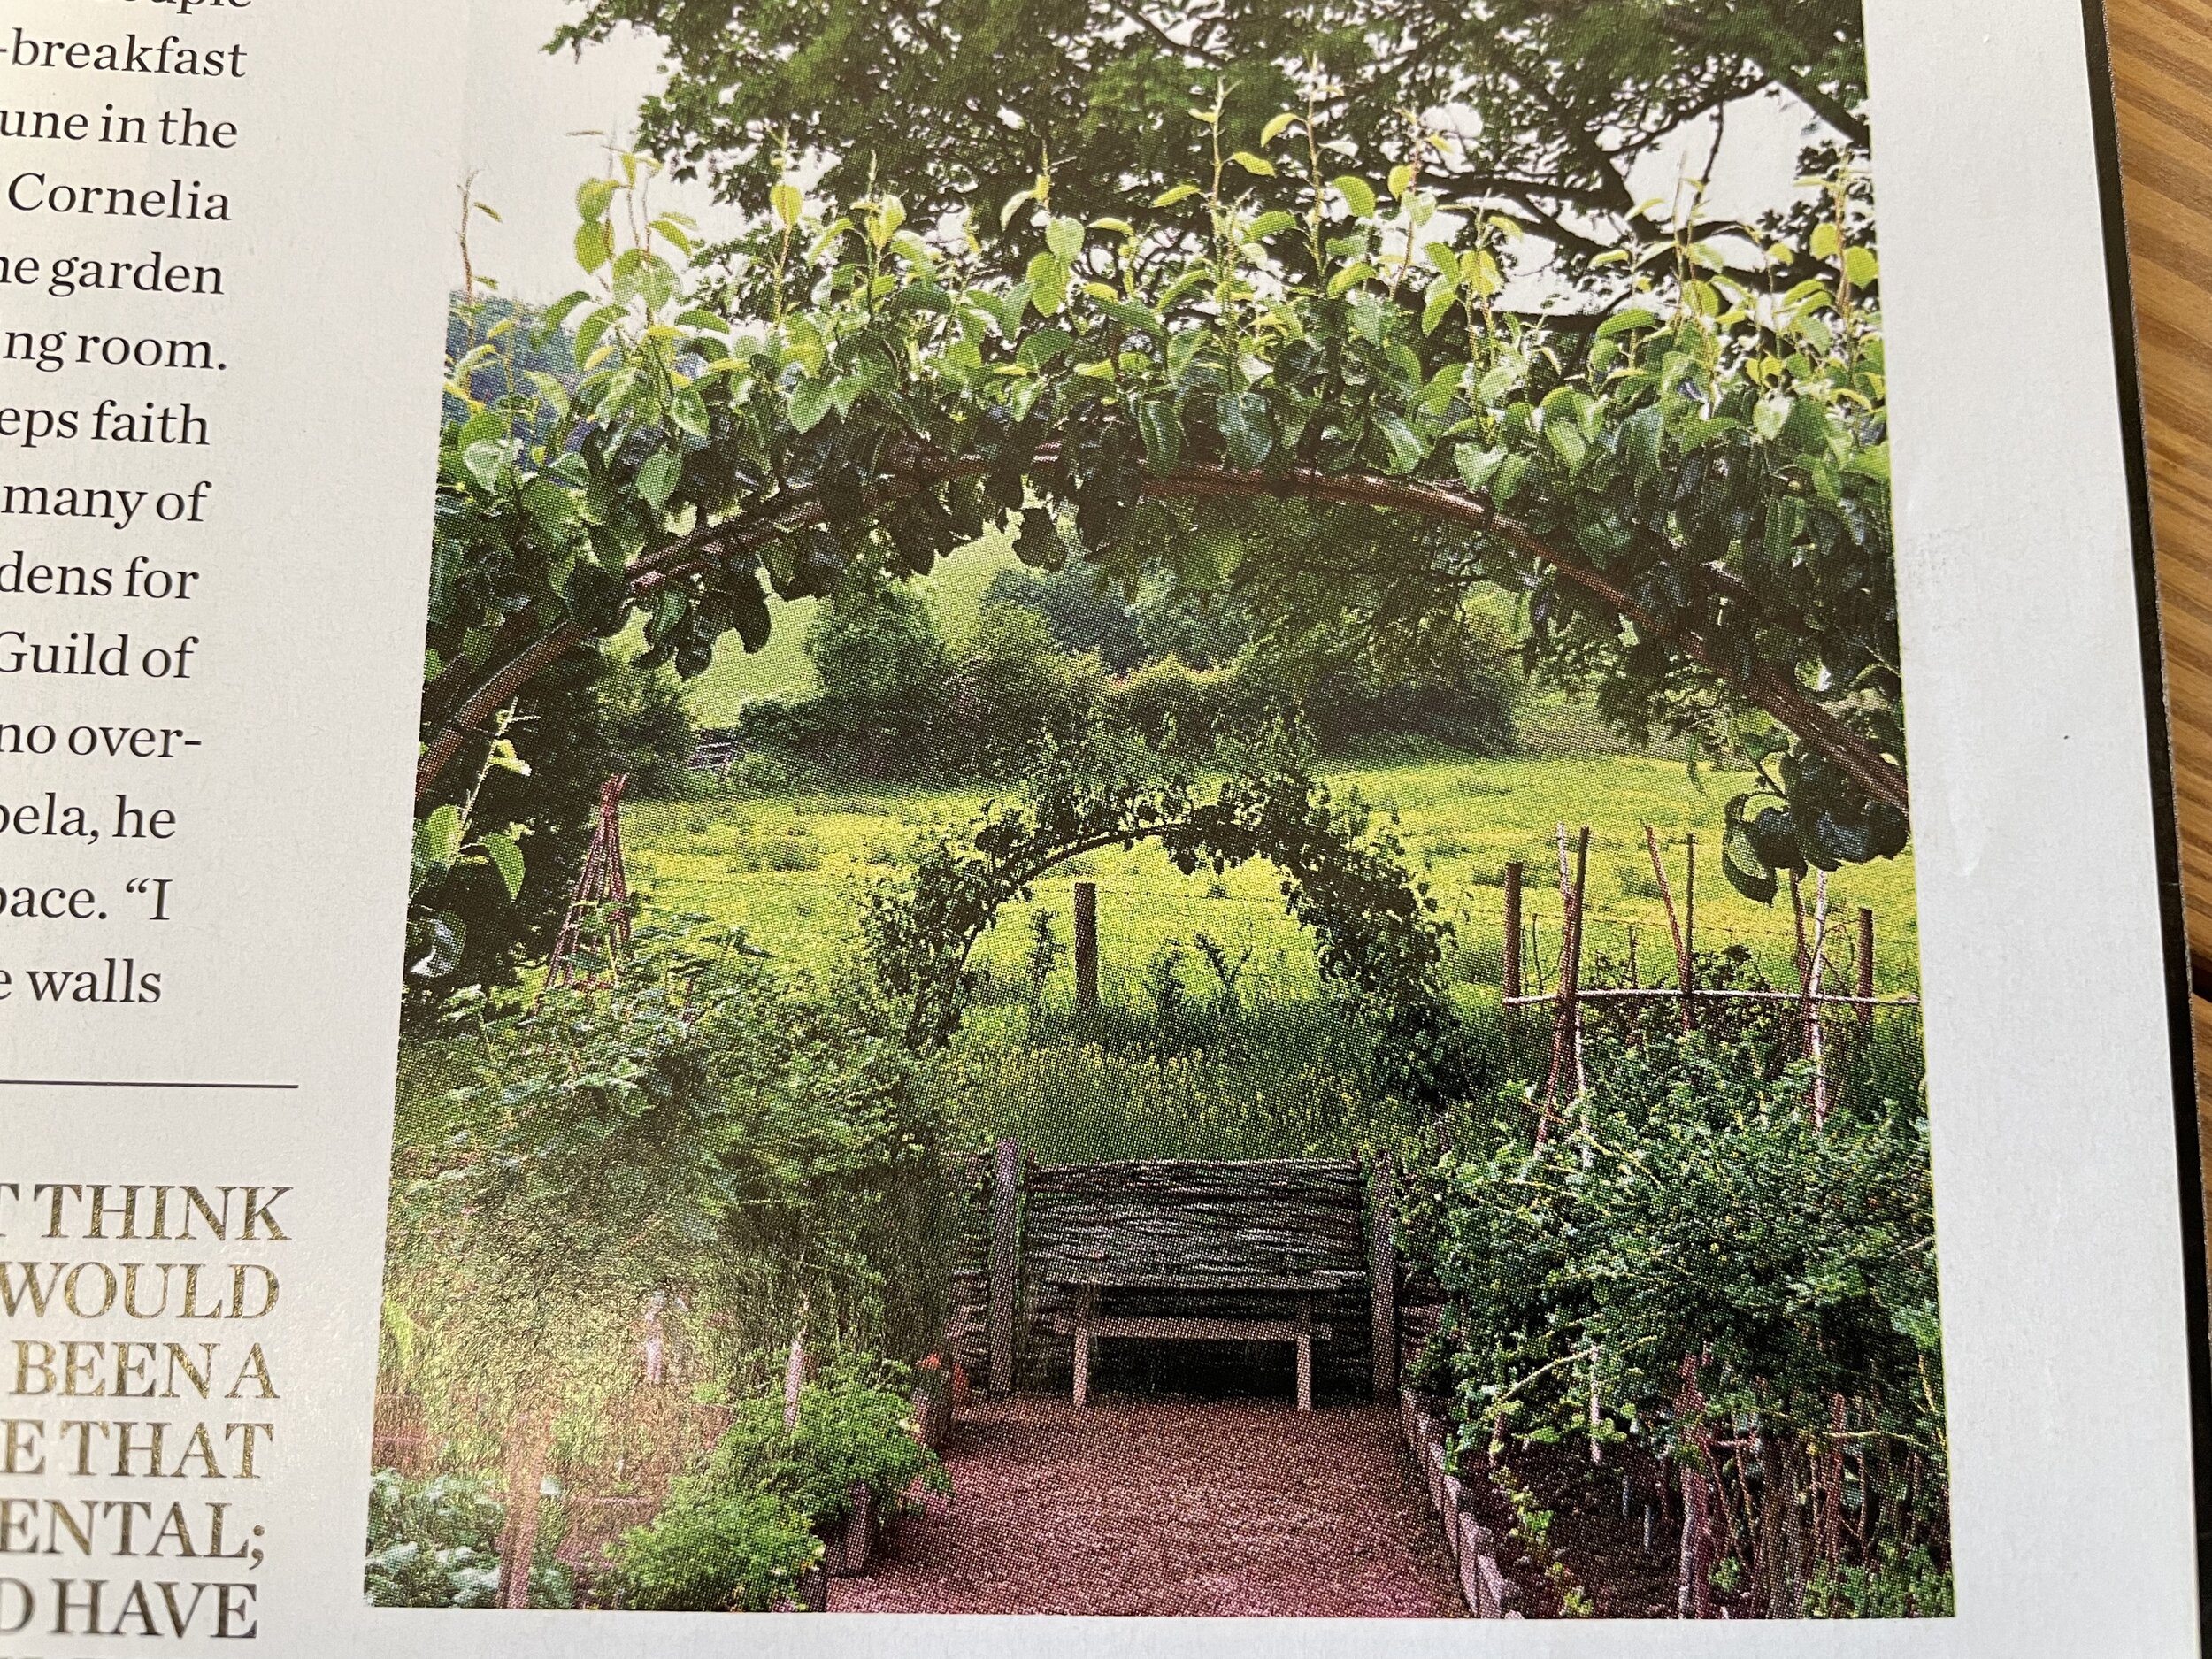
The inspiration for my kitchen garden, or potager, came from a Garden Design, Winter 2012 magazine article, Simplicity Rules, on well-known garden designer, Arne Maynard’s rustic and historic late medieval farm, Allt-y-bella. Located in Wales, much of the rustic gardens and garden structure remind me of Provence. I envisioned borrowing a lot of the main elements featured in the article and photos, creating the look of a rustic kitchen garden. Some of these elements that caught my interest were the wattle hazel fencing, arching fruit trees with a centered bench, raised beds for vegetables, obelisks for climbing vegetables, easy pathways around the raised beds, and select spots for larger perennial plants like rhubarb and artichokes.

Allt-y-bela Kitchen Garden Pathway, Arching Fruit Trees, and Bench, Garden Design 2012

Allt-y-bela Kitchen Garden Pathway, Arching Fruit Trees, and Bench, Garden Design 2012

In 2015, I started creating a kitchen garden space to the north of our vineyard, with 4’ x 8’ raised bed kits. I looked high and low for hazel or willow wattle fencing for enclosing the kitchen garden similar to Allt-y-bella. I couldn’t find any source at the time. I needed about 75’ total. However, I happened to find a large amount of rolled willow fencing at Rogers Gardens at 50% off in an obscure sale corner. My intention for fencing the perimeter was to keep our chickens out of the kitchen garden as well as any random critters.

Up until 2020, my kitchen garden was good, and a work in progress. Over time, with sun exposure and high winter winds the willow fencing began to come apart and break down. This is common. I started looking for what I call wattle or willow fencing again.

My Kitchen Garden, June 2020

My Kitchen Garden, June 2020

Last month I found willow fence panels online at Master Garden Products. They offer a nice selection and sizes of willow fencing, panels, borders, obelisks, etc. They are out of the Seattle area, and will freight orders to you. I purchased 6’ L x 3’ H woven panels for my entire perimeter, and used the same anchoring rebar and metal stakes that were already in place. I am really pleased with the look, and the material overall. I also purchased three obelisks for climbing beans. The willow panels are stronger and sturdier than the rolled fencing, but will eventually break down over time.

My Kitchen Garden, May 2021

My Kitchen Garden, May 2021

Fine tuning the willow fence, I will put put larger rocks around the bottom of the fencing, to discourage critters from burrowing under the fence.

Starting an Outside Row of Perennial Artichokes

Starting an Outside Row of Perennial Artichokes

For more information and musing on how I create garden rooms from garden magazines, photos, and design ideas, please go to my previous post, The Making of a Garden Room.

French Fabulous! On Netflix, there is a new French subtitled drama series, Lupin. It is like a modern day “Houdini” Thriller series. Lots of twists and turns. Not only does it keep you on the edge, it is filmed mainly in beautiful Paris. Once you watch an episode or two, it draws you like a magnet. With two series completed, I see there is a third one coming.

Bon Appétit and Bon Weekend….Bonnie


Spring at Domaine de Manion
Morning South Garden

Morning South Garden

 
Coop de Manion

Coop de Manion

 
Last of the Wisteria

Last of the Wisteria

 
Happy Heavenly White Narcissus

Happy Heavenly White Narcissus

 
Incense Mix Sweet Peas—Love the Purples

Incense Mix Sweet Peas—Love the Purples

 
White Garden Before the Blooms

White Garden Before the Blooms

 
Cheery Cherokee Rose

Cheery Cherokee Rose

 
Just Joey Rose, World’s Favorite Rose in 1994

Just Joey Rose, World’s Favorite Rose in 1994

 
Bud Break in the Vineyard

Bud Break in the Vineyard

 
Follow Your True Path

Follow Your True Path

 
Spring Sunset

Spring Sunset


Happy Spring and Bon Weekend….Bonnie

The Making of a Garden Room
February 2021, Winter White Garden, Leucojum Blooming, Looking West

February 2021, Winter White Garden, Leucojum Blooming, Looking West

I am not a Landscape Designer, but I have had success in creating garden rooms from my vision. These garden rooms take time, and thought, and hard work. Don’t forget patience. In the end, however, the garden room I create usually evolves into something much better than my original inspiration and the original vision I had in my head, and I am overjoyed. I thought you might be interested in how I do it.

This is somewhat similar to what I wrote and mused about in January 2021. Dream big. Create a vision. Make your intention, own it. Release it to the universe to manifest it. Detach yourself from the outcome. If everything is aligned, your outcome is delivered to you, incredibly better, and so much more than you could have ever imagined.

May 2019, Spring Time White Garden, Roses and Alstroemeria Blooming, Looking West

May 2019, Spring Time White Garden, Roses and Alstroemeria Blooming, Looking West

1) Have a garden location or garden room area where you want to create a special spot. It might be a blank canvas, or it might be an existing garden that needs refreshing or revising.

2) Find inspiration in garden magazines, tours, books, and even word of mouth. Save these inspirations in a file. I found the inspiration for my white garden, two photos above, in a Garden Design May/June 2010 magazine article featuring a Charleston, South Carolina garden. I have not been to Charleston yet, but hope to get there one day. This particular photo really caught the vision and idea of what I wanted to do. It was a small garden, close to the house, appeared enclosed or walled, was European influenced, used topiaries, appeared to be half garden/half patio, was elegant, and visually beautiful.

Inspiration Photo from Garden Design Magazine May/ June 2010, of Charleston, S.C. Garden

Inspiration Photo from Garden Design Magazine May/ June 2010, of Charleston, S.C. Garden

3) Be aware that your piece of inspiration will most likely not be carbon copy of what you want, but it will have the bones in it, of what drew you to it. It will be much more than you ever imagined.

4) Put in your structural boundaries, or build your perimeter. First, we built a new fence near our property line, where none had existed. I planted a podicarpus privacy hedge on the north, and a privet hedge on the south close to our home. Our existing garden shed was the south boundary, and the back of my garage, the east boundary.

5) Create more garden details. Instead of brick, I used a stone pea gravel to create a large square which would anchor half of the garden. The other half of the garden, I created a square boxwood parterre with a bay laurel topiary tree, and iceberg roses, and connected them with mulched walking paths.

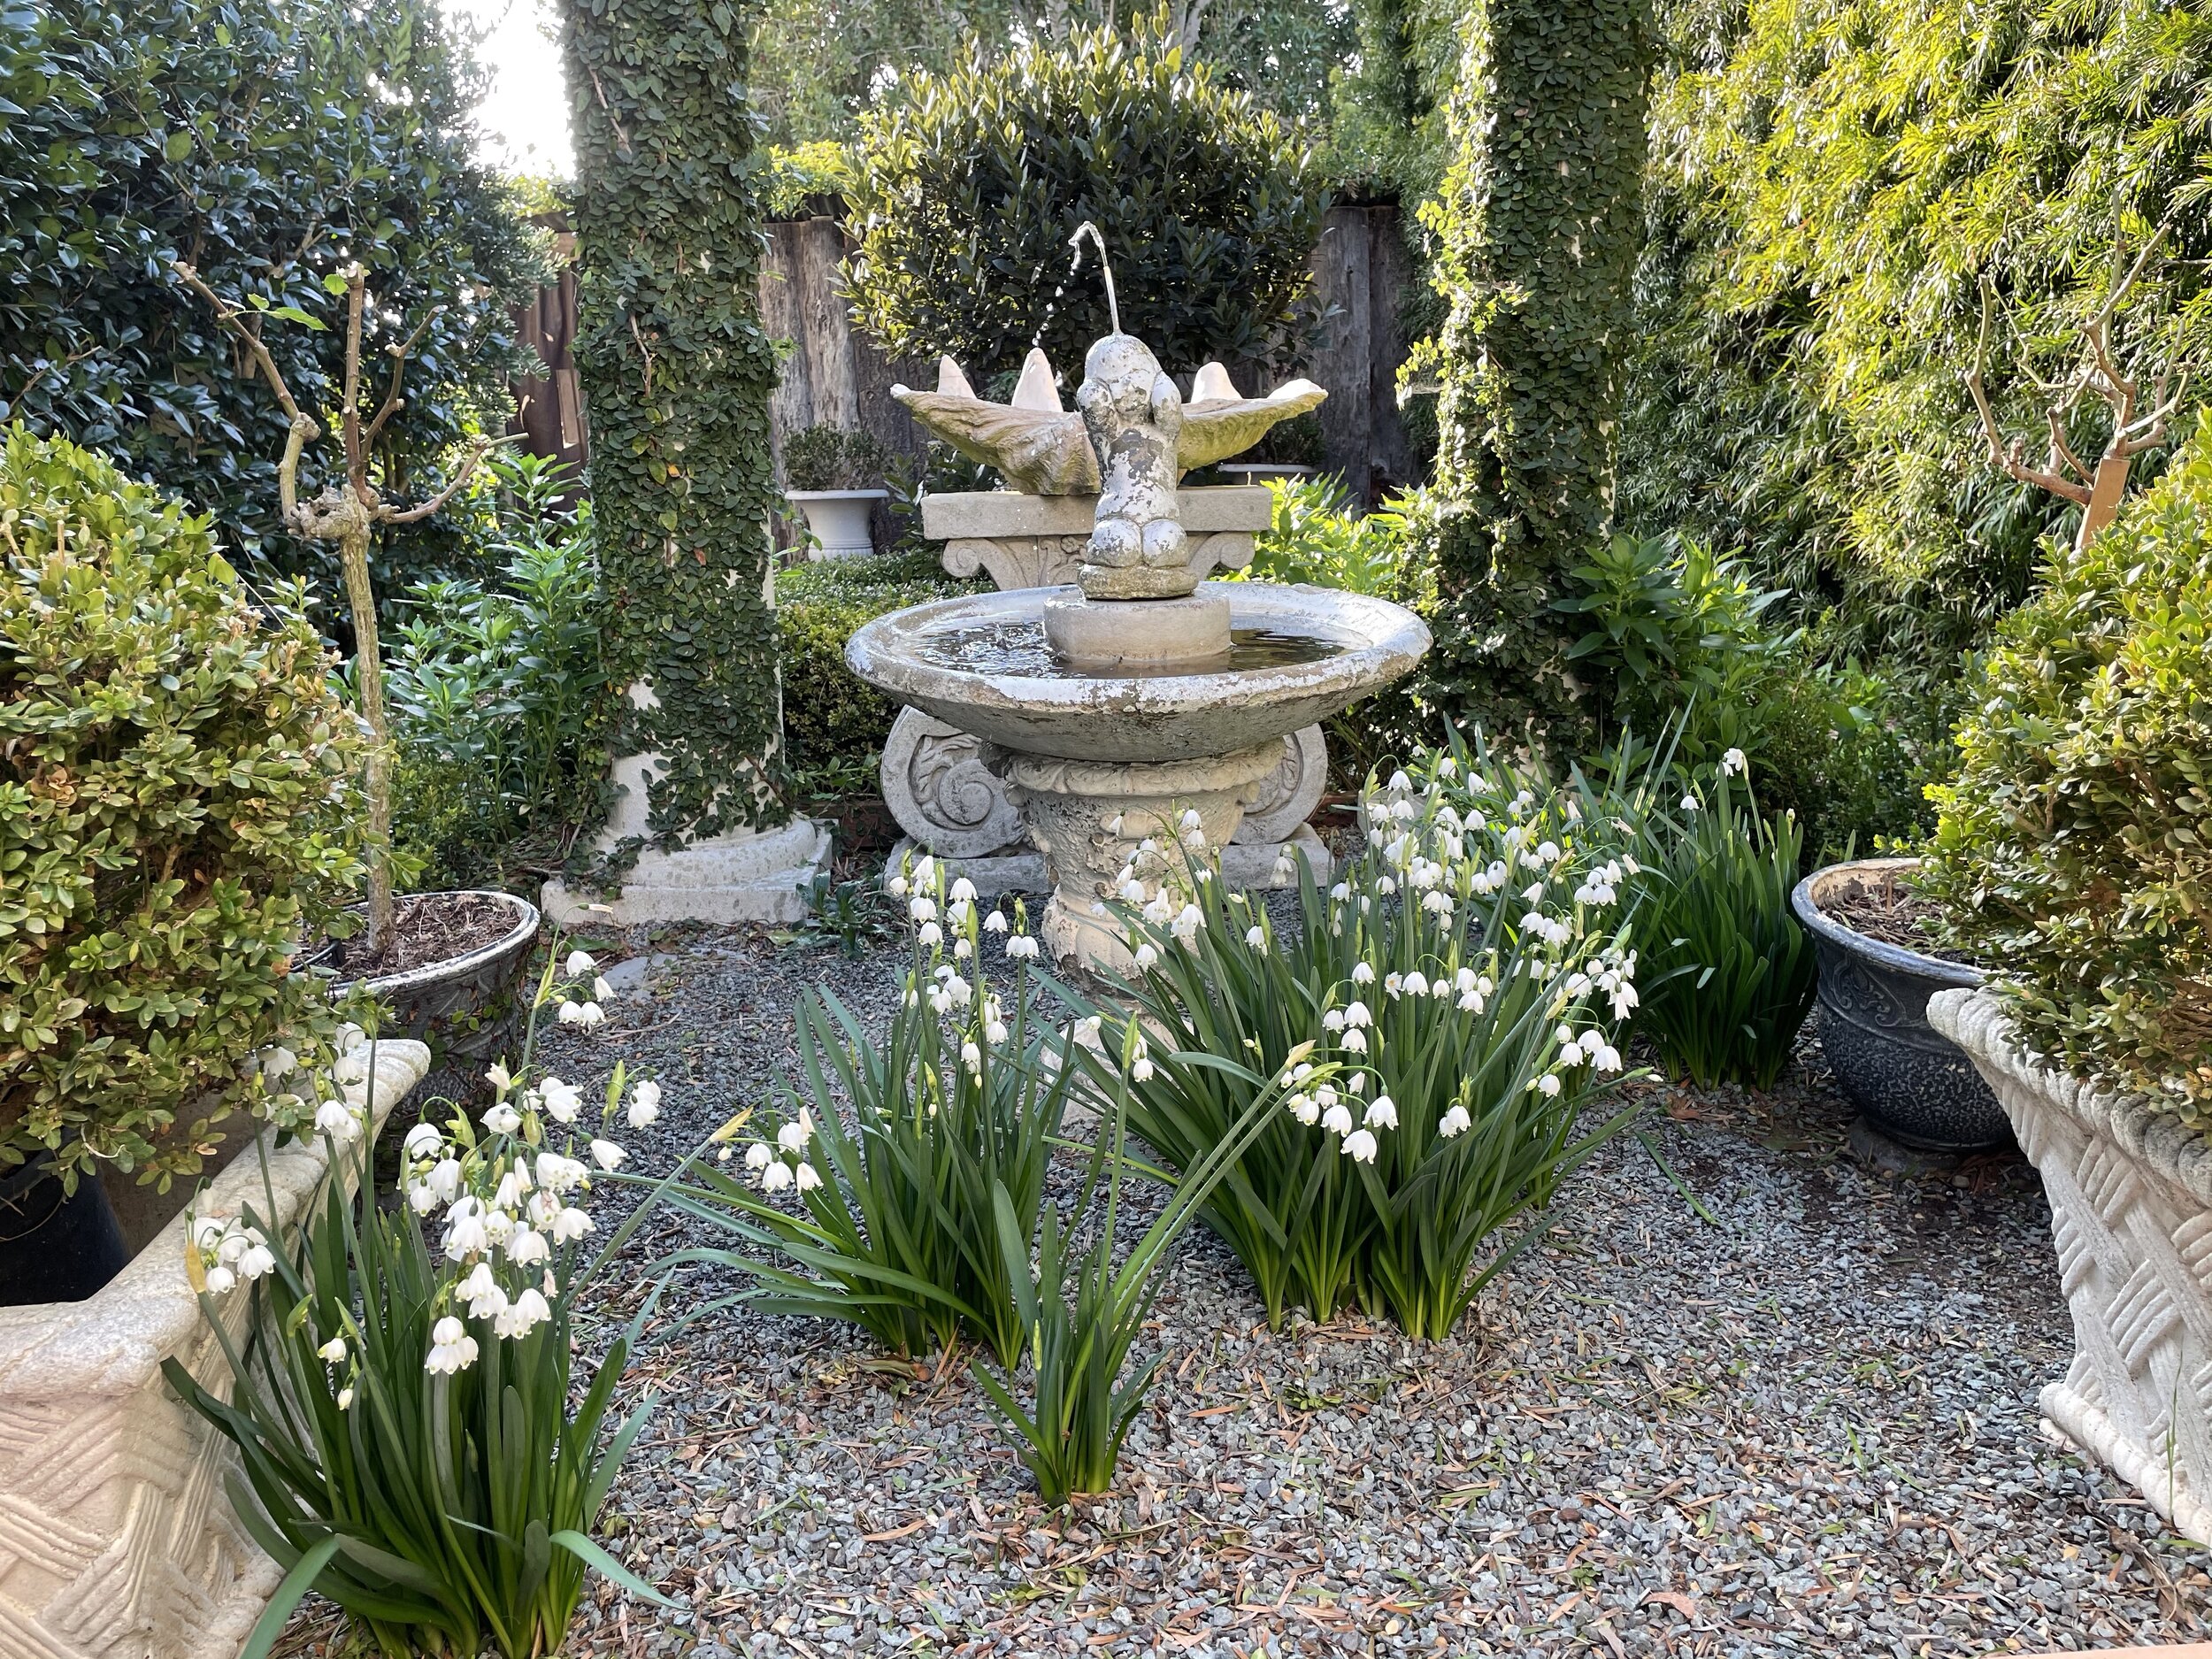
6) Add your adornments. Collect these over time. I had an existing vintage “garden baby” fountain, which found a home, front and center in the pea gravel square. It is also a cooling water feature in this little garden, and a great spot to watch little birds relaxing and bathing. Later I acquired two faux pillars, light as a feather, but very real in appearance. Next came more vintage pots, in white, and so white was the theme for the garden.

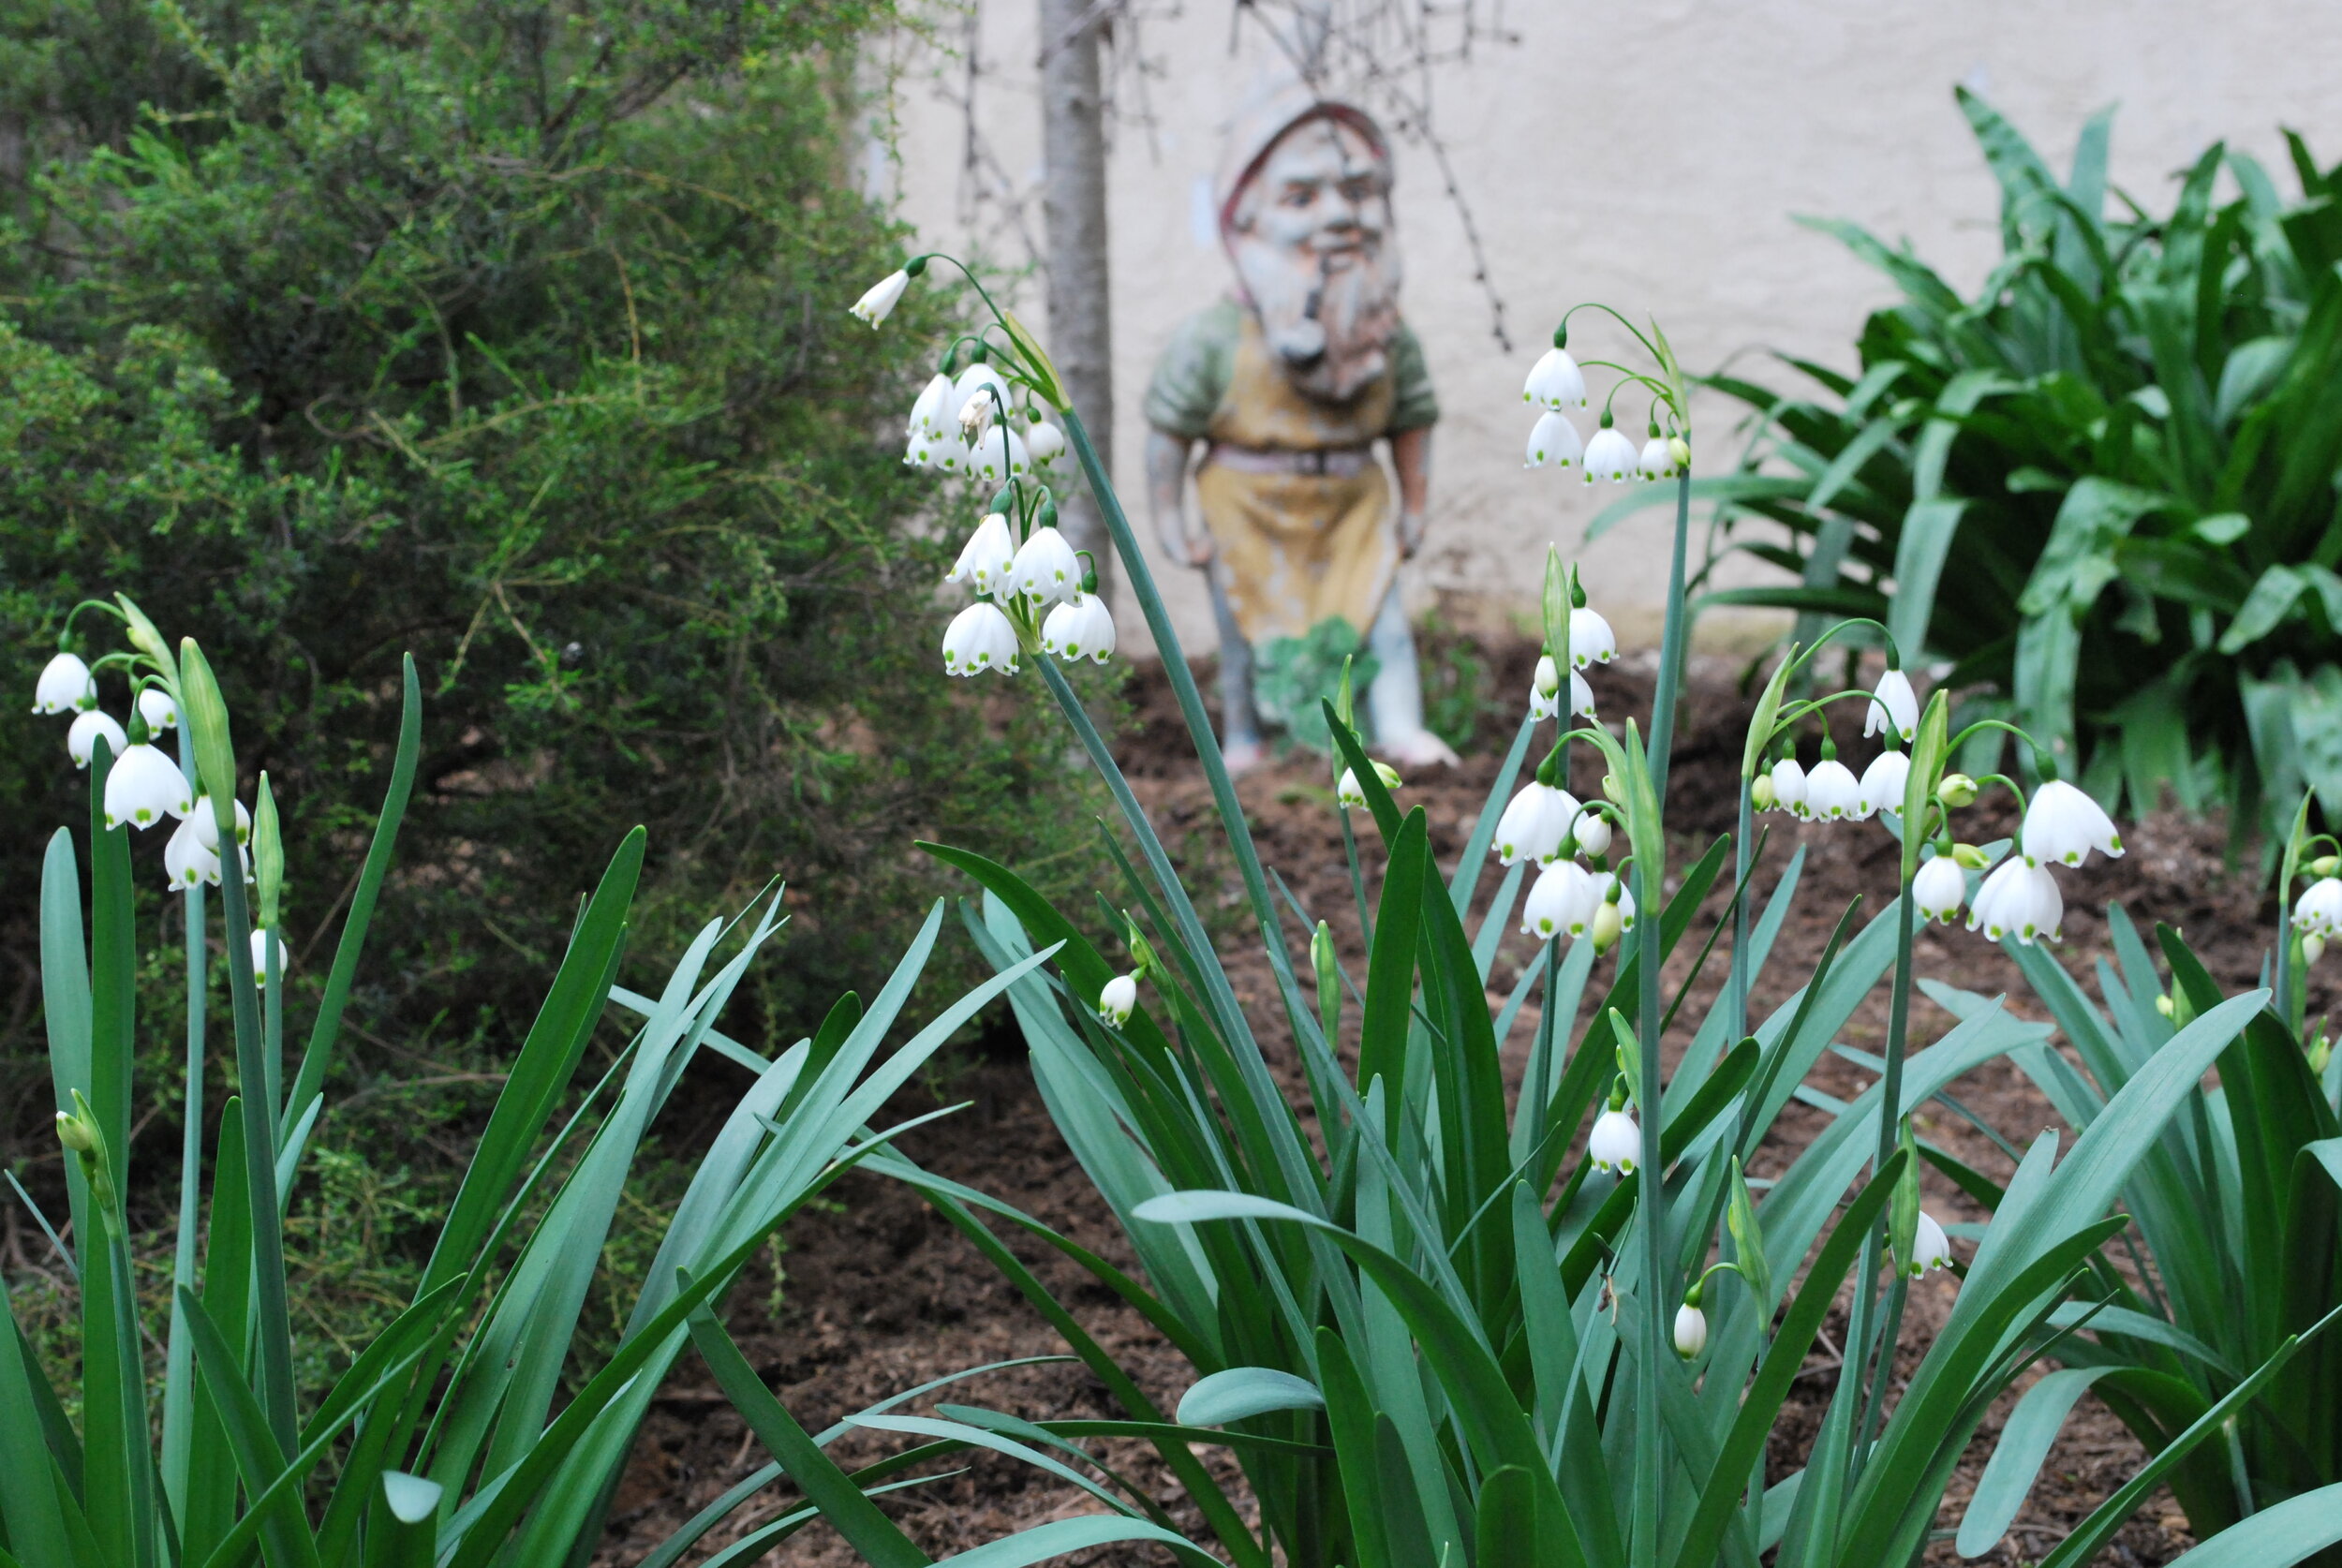
7) Assemble your plant materials, plan for different plants to bloom each season. Plan your plant palette. I planted several white iceberg roses, some bush, some topiary. Alstroemeria “Casablanca’ are tall, have movement, and anchor each pillar. Leucojum, perennial bulbs planted in the old garden, return each year unscathed through the pea gravel announcing spring is around the corner.

8) Let your garden design itself. Over time, I find the garden starts to take over, and create its own design. Picture an abandoned house or church, where the landscape slowly creeps in, and starts to reclaim the structure, and design itself. My privet hedge created a natural archway with a side limb reaching out to the pillar. Creeping fig, which was so hard to start in the beginning, now has almost totally covered each pillar.

Before Photo, Looking East, Circa 2001

Before Photo, Looking East, Circa 2001

Immediately above is the only photo I have of the garden somewhat early on, and I think it is around 2001. It is not even what the garden looked like when we first moved in. The camelia bush was existing, but there was no lawn, only weeds. The big change came in 2010, when we completed our home remodel, and this space became a small but inviting area for an intimate garden.

After Photo, Looking East, February 2021

After Photo, Looking East, February 2021

Immediately above, is how my white garden looks today. Happy and healthy, and looking forward to spring!

 
Leucojum Blooming

Leucojum Blooming

Click on Spring Blooming Gravetye Giant for my past post on the perennial bulb beauty. Please share where you get your garden inspirations and/or how you have created your favorite garden. Do tell!

Bon Weekend….Bonnie
Fab Fava Beans
Fava Beans Started From Seed

Fava Beans Started From Seed

Fava beans are a great addition to a fall potager. In fact, I usually start my fava beans about the same time I plant my sweet pea seeds, both are mature about the same time in the spring. Fava bean plants are beautiful in your potager with their striking black and white flowers, and added bonus is they give back, adding nitrogen to your soil.

Fava Beans are symbolic of spring in the potager, part of eating seasonally. They have a short season like white asparagus, if you can find them at the farmers markets. That is all the more reason to sow them in your potager, and enjoy their nutty flavor in the spring. You can make soups, salads, and even appetizers with them, and will share with you some recipes this spring.

 
Soak Beans First Over Night Before Planting

Soak Beans First Over Night Before Planting


I have enjoyed fava beans for a long time, here is another post on fava beans from my archive. Enjoy!

Do You Grow Fava Beans?


Big on Bulbs
First Year Blooming

First Year Blooming

Over the years I have seen great articles on planting swaths of narcissus bulbs to naturalize in your lawn. It was a project I had always wanted to do. In the February 2019 issue of Better Homes & Gardens, a very informative and enticing article, motivated me to buy 200 Heavenly All-White Mixture narcissus bulbs in the fall, refrigerate them for weeks, create my design, and plant them.

My garden is always one big experiment after another, some ideas work great, some don’t. I thought a lawn filled with happy narcissus was more likely to thrive back East rather than in Southern California. The very pleasant folks at Van Engelen assured me if I refrigerated my bulbs first for 8 to 10 weeks, the bulbs would bloom beautifully in a Southern California garden, and would bloom every year thereafter. There are varieties that will do better than others, so always ask, and do your homework. Some bulb companies feature a “Warmer Climate Bulb” category to assist you. I was so pleasantly surprised at the beauty and success I had in planting the first bulbs, that I ordered another 100 bulbs, and have them in the refrigerator now. Other bulb websites to shop at are Brent and Becky’s Bulbs , Easy To Grow Bulbs (located in Southern California) and Floret Flowers.

Garden Tip: Shop bulb catalogs and websites over the summer. Make your wish list. Order early, as bulbs often sell out. Refrigerate your bulbs if necessary for suggested time. Plant in fall when weather cools, and temperatures drop below 55 degrees. Patiently wait for spring. Et voilà!

 
Do Your Homework

Do Your Homework


Narcissus bulbs are a great addition to your garden, once you plant them, they give back every year with their effortless blooming, and symbolically announce the beginning of spring. Not only are they striking in mass, they naturally deter gophers, and so are functional as well in your garden. I list here a few additional posts about narcissus bulbs from my blog archive for your reference.

Do you have narcissus bulbs in your garden?

Narcissus Bulbs Naturally Deter Gophers

Go Green With Gophers

How to Grow Perfect Paperwhites


Tomato Touché
San Marzano Tomatoes

San Marzano Tomatoes

Last February a dear friend gave me San Marzano tomato seeds from Italian Franchi Seeds to grow. Fast forward to August, and it was time to harvest. San Marzano tomatoes make a beautiful sauce, but I wanted to dehydrate them, a first for me. I have a setting on my oven, and used that method over night.

 
Dehydrated San Marzano Tomatoes

Dehydrated San Marzano Tomatoes

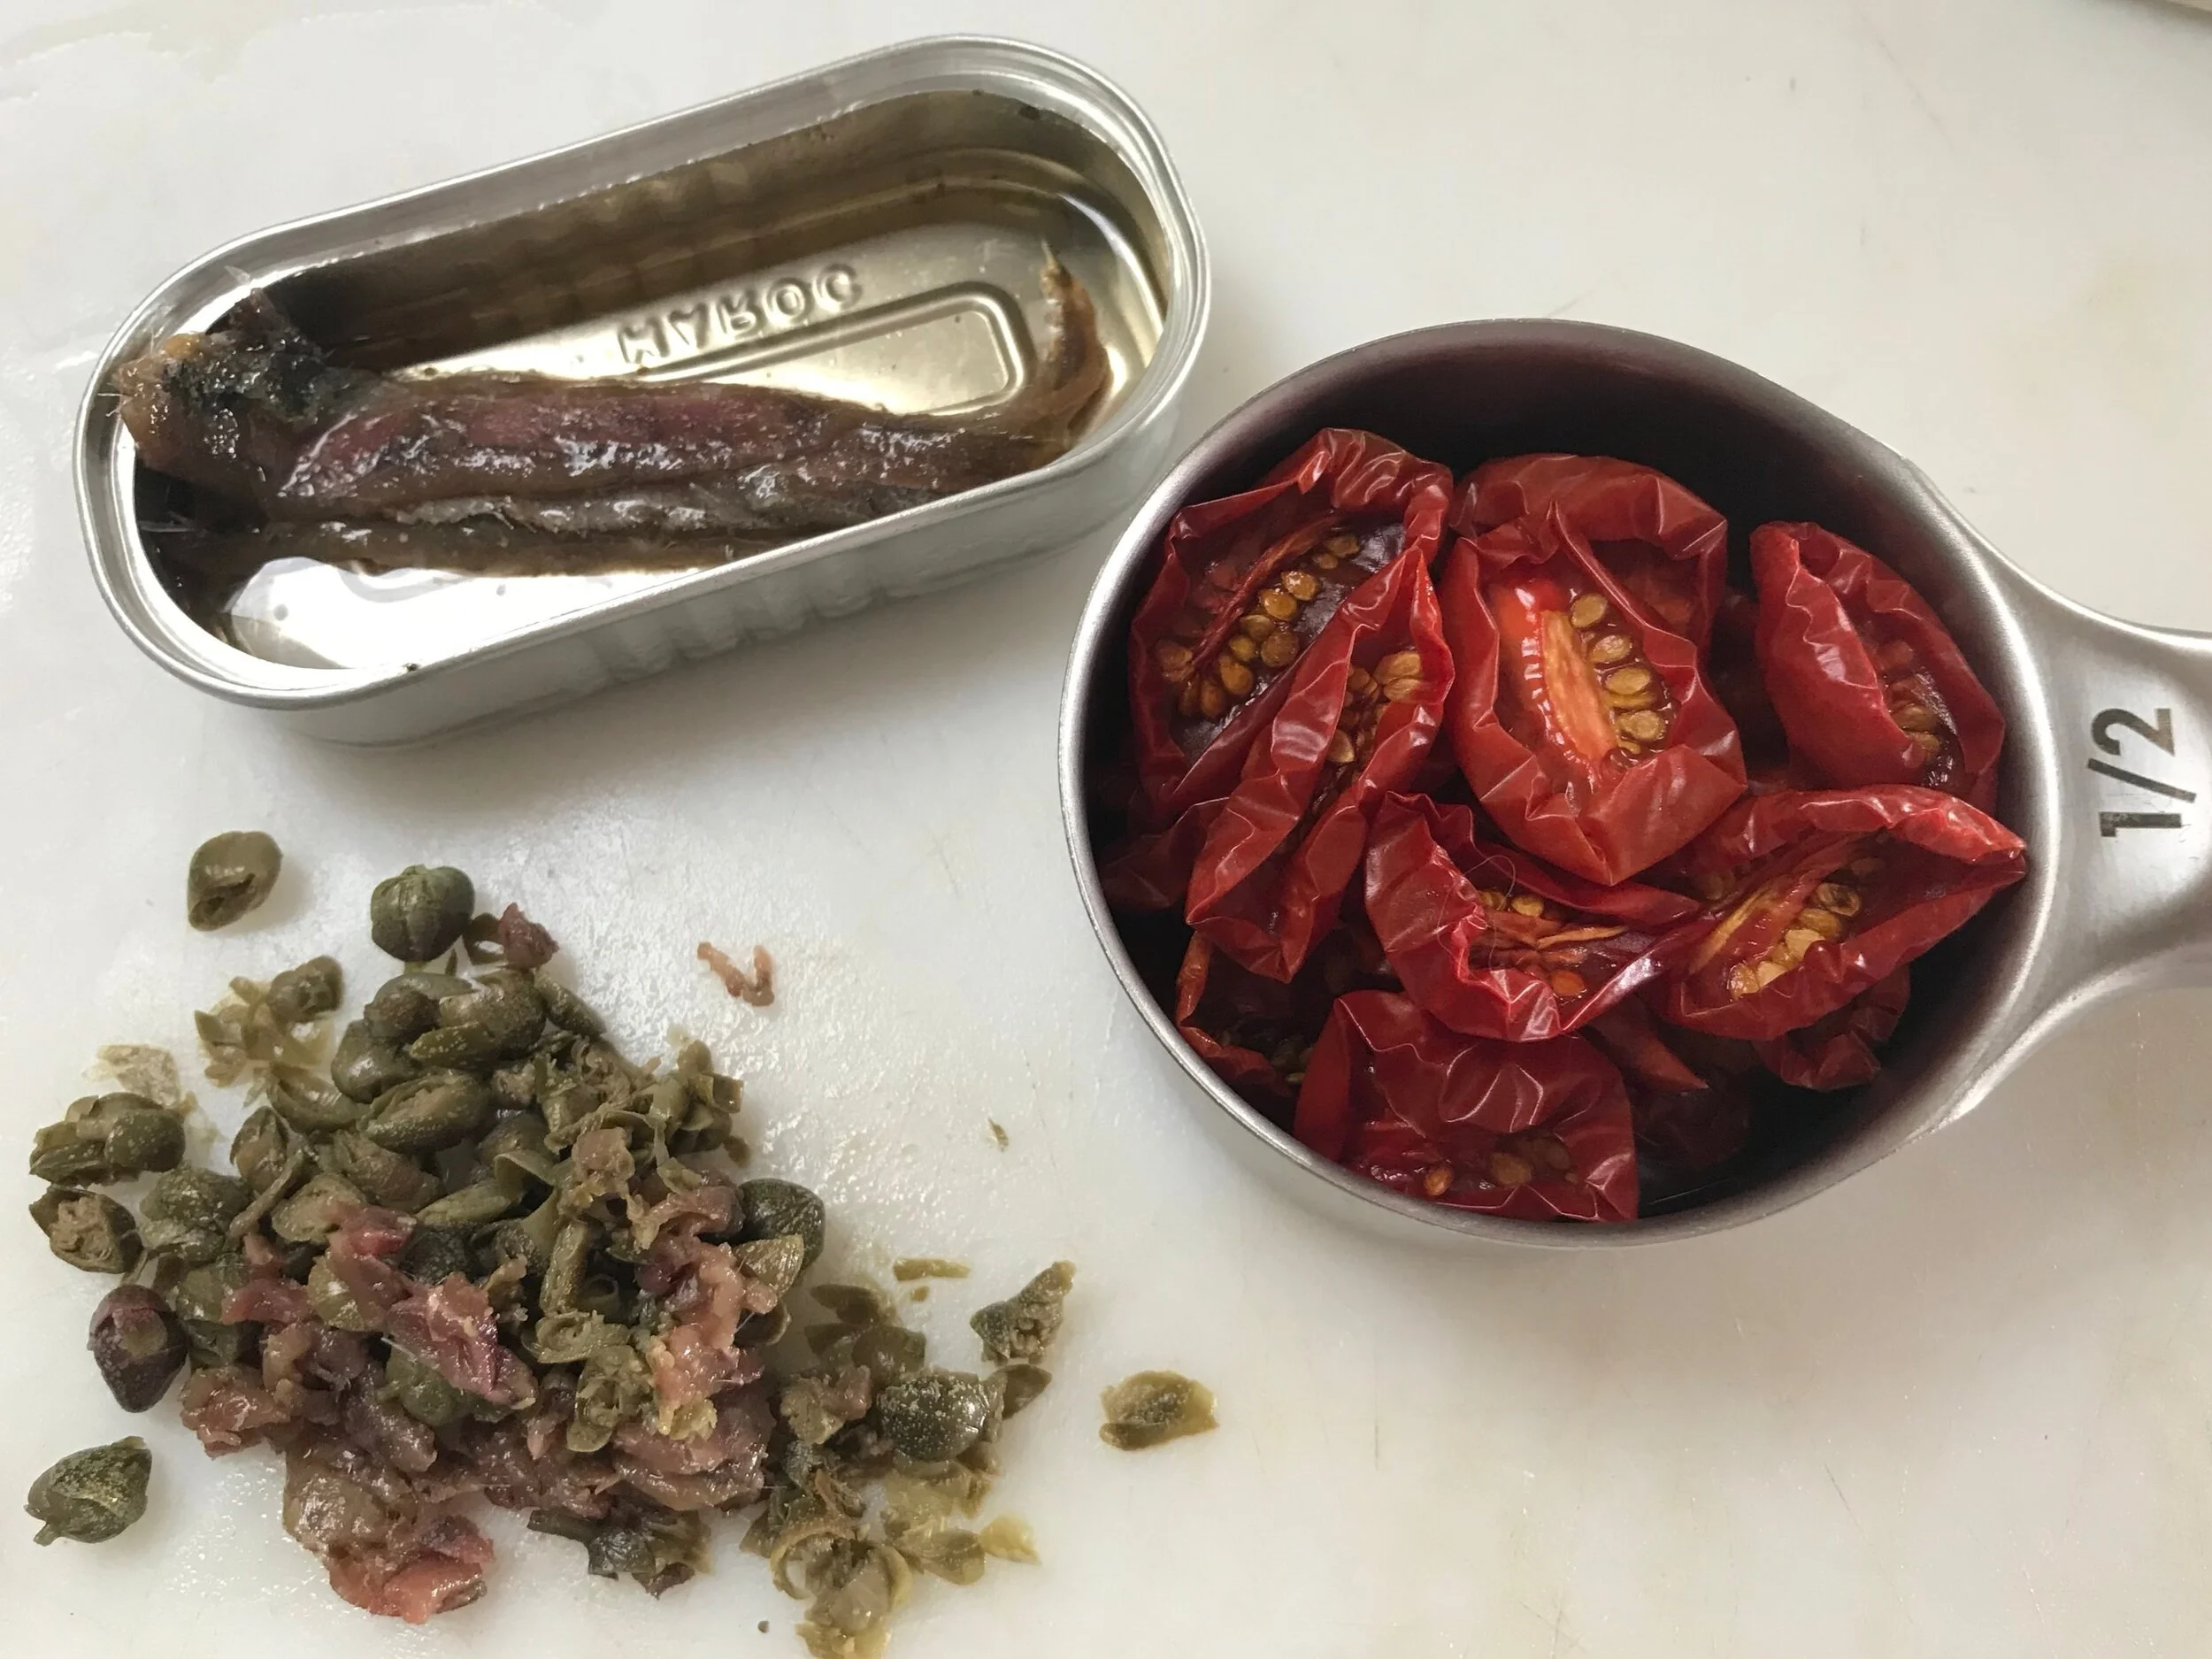
Beautiful crimson color matched with a flavorful tomato intensity, I wished I had grown more of these tomatoes. Remembering a quick recipe from Alice Waters, The Art of Simple Food II, I made her Crostini with Dried Roma Tomatoes, Anchovies, and Capers. This recipe is made with simple but ingredients you most likely have in your pantry, and with the star addition of dried Roma Tomatoes.

 
Anchovies, Capers, Olive Oil and Dried Roma Tomatoes

Anchovies, Capers, Olive Oil and Dried Roma Tomatoes

 
Dried Roma Tomatoes, Anchovies, and Caper Mixture Ready for Crusty Bread

Dried Roma Tomatoes, Anchovies, and Caper Mixture Ready for Crusty Bread

 
Lovingly Adapted from Alice Waters, The Art of Simple Food II

Lovingly Adapted from Alice Waters, The Art of Simple Food II

Waters likes to add fresh chopped parsley or marjoram to each crostini for a touch of green, punch, and texture.

Please share if you dehydrate tomatoes or other foods you grow. Please share if you have a great Roma tomato recipe.