Posts in Green Tips
Seed Sprouting Success

DSC_0894Chances are you have everything at your finger tips for creating perfect seed sprouting success. Sprouting seeds yourself is economical and expands your ability to grow many more varieties.

Materials Needed: 1) Saved plastic tubs with lids and with bottom holes for drainage. Fruit such as berries are often store-packaged in these containers. 2) Potting soil, or seed starting medium. 3) Desired seeds to sprout. 4) A handy chopstick, to make a hole or indention for your seeds. 5) Label gun to label your seeds started and the date. 6) Spray bottle with plain water to mist your seeds in soil medium. 7) Safe place with filtered sun exposure. 8) Time and patience.

I started my saved heirloom pumpkin seeds this way. I simply picked out my desired size plastic tub container. I filled each tub with moistened seed starting medium. I took a chopstick and made my number of desired holes in each tub for my seeds. I then filled each hole with a different heirloom pumpkin seed, and covered the seed over with soil. Once again, I misted each tub again. If you create a label and date for each tub containing seeds, you'll always know what you planted where and when. I keep the container lid closed, as it acts like a mini-greenhouse creating warmth and keeping in extra moisture for your seeds. This further helps germinate your seeds. I placed each tub in a filtered sun spot, in this case, in my potting shed. Every morning I opened the lid of the tub, and misted the seed starting medium, and closed the lid once more.

In about 8 days my pumpkin seeds had germinated and were too tall for me to close their lids. My pumpkin seedlings were now ready to be transplanted to shaped mounds in the ground. Since I started my seeds in my outdoor potting shed, they are already to be planted in the ground. If you had started seeds in your garage or an indoor environment, you might have to include the step of hardening off, or gradually acclimating your delicate seedlings to the outdoors for small periods of time before actually planting them in the ground.

Here is a fun link for more information on starting seeds, Seed Starting For Real People by Kelly Roberson. She suggests starting seeds in an empty egg carton, as an alternative to plastic containers. Roberson also includes a handy chart for Best and Worst Seeds to Sow Indoors and Outdoors. Thanks Kelly for sharing.

Please comment if you have a favorite method for seed starting success. Please share your favorite seeds to start yourself.

Local Gardener Receives Royal Treatment

This past spring, the Village Garden Club of La Jolla brought Englishman Shane Connolly to San Diego for it's fifth "Meet the Masters 2012" program. This program is an annual garden club highlight, and it's keynote speakers are generally the highest caliber of internationally acclaimed floral designers.

In April of 2011, Shane Connolly led the floral design team for the marriage of Their Royal Highnesses, the Duke and Duchess of Cambridge, better known as Prince William and Kate Middleton. Remember the surprise tree-lined aisle inside Westminster Abbey. Connolly has designed floral creations for the royal family for over twenty years. Known for his sustainability interests and natural approach to floral design, his clientele is worldwide.

During his time in the San Diego area, while demonstrating his floral design, Connolly  spoke freely on his unique approach to floral design. Connolly has a broad foundation as an artist and a musician. His first professional field was psychology, and his floral design career blossomed unexpectedly from friends urging him to try it.

Connolly is proficient in the symbolic language of flowers and this knowledge only enhances his floral designs.  Connolly's sustainability interest and natural approach to floral design is simply refreshing. Connolly was also eager to tease his enthusiastic audience with tiny snippets about Prince William and Kate Middleton's wedding.

Connolly demonstrated and spoke his way through numerous floral designs at his formal presentation at the Museum of Contemporary Art in La Jolla, on Thursday, March 8, 2012. The following day, he toured, created a massive floral design, and enjoyed a social lunch at Lani Freymiller's North County private garden with a distinguished group of 35 LJVGC members.

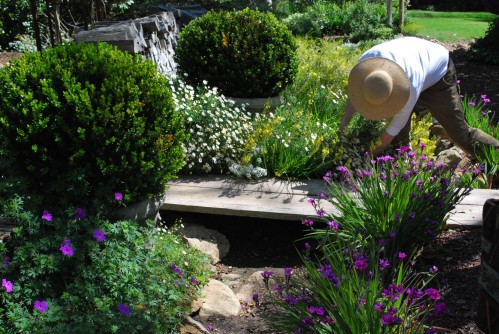
Freymiller, a retired grade school teacher, is an artist in her own right with an impeccable eye. She has designed her breath-taking garden slowly over a period of nearly 40 years, and has received countless accolades and recognition. Perhaps the grandest compliment yet, is her local garden receiving this royal treatment.

Touring through Freymiller's stunning garden, Connolly choose sprays of Cherokee Rose, Tuscan Blue Rosemary, Pearl Acacia, Mock Orange, Rue, Silver Waves Camellia and many others. He also shared best pruning practices, such as prune from the trunk always, and prune first errant growth at the bottom of plants. In time, he had his desired mixture of garden cuttings to create his grand garden floral design. His container of choice naturally was a vintage tub.

Connolly charmed everyone, as he continued to share his design tips and philosophy. Freymiller was a gracious and  extraordinary hostess,  warmly sharing her beautiful garden. This special day will be fondly remembered by those attending for a very long time.

Connolly's Tips for Timeless Artisan Floral Decorations & Sustainability:

-- "Use a few seasonal flowers simply, with the prime objective of showing them off and emphasizing their individual characteristics."

-- "Designs live on after being created."

-- "Group things together, it is more like they grow in the garden."

-- "Use chicken wire, instead of an oasis. Put flowers in water."

-- "Let  flowers tell you where it wants to be in the arrangement. Lovely to let flowers do what they want to do."

-- "When you've done something, walk away from it. You can angst too much over flowers, and take their soul."

-- "Conditioning of things is most important, and the condition of things."

-- "I like shades of color. Don't dilute color with green."

-- "I like things that look like they were grown in someone's garden."

-- "I like using two same containers in different sizes."

-- "When doing an arrangement, tougher things go in first."

-- "You want  a physical balance, as well as a visual balance." Antithesis  of arrangements is to make a shape. Asymmetrical looks artful."

-- "The love of garden dictates your designs."

--"I think everyone should get their hands in some mud."

Garden Spider Art

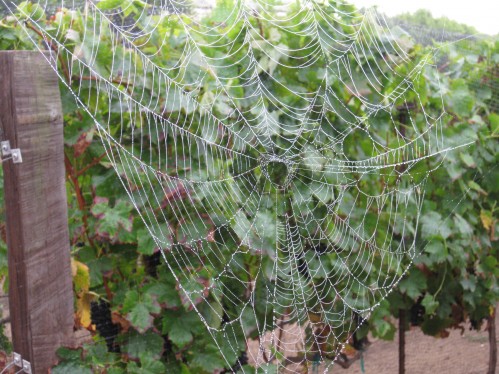
Spider Web Framed by the Vineyard It is Sunday morning and I'm cleaning out our chicken coop. Life just might be returning to normal after our remodel. On the way to our chicken coop I couldn't help but notice this garden spider art, a beautiful silk web gently swaying in the morning breeze amongst our grapevines. Take time to smell the roses. Take time to experience the little miracles in your garden, like these delicately spun architectural webs.

Spiders in your garden are a good sign that your garden is healthy. Spiders do not eat plants, but are voracious predators of insects. Their web art is an enlargement of their highly specialized sensory support system, and how they trap their prey. I looked but did not see this talented spider who created this delicately engineered web. Maybe this busy spider was fodder for something else in my garden.

Quickly my thoughts went to the classic story, Charlotte's Web. Could this be my Charlotte? How does she know how to create such an artistic web? How long does it take to spin her web? How long will this web serve her? What attracted Charlotte to our garden? Where did Charlotte go?

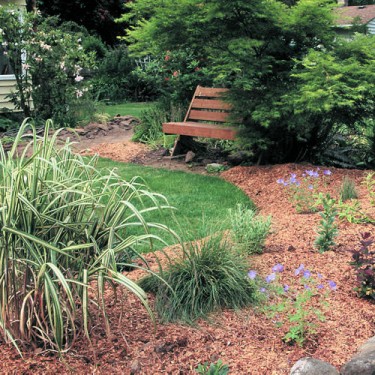
Spiders, in general, are not to be feared. Most spiders are not dangerous to people. Create an inviting environment for spiders, or your Charlotte, in your garden by following these steps. Use mulch in your garden which provides spiders protection and humidity. Provide tall plants or gates for ease of web attachment. Leave some open areas in your garden for their over-wintering habits. Grow plants that attract insects. Take a moment to realize, just like snakes are beneficial in your garden for eating gophers and rodents, spiders too, are beneficial. Don't use pesticides in your garden.

VintageGardenGal Tidbit Thyme....

VintageGardenGal, "a garden lifestyle blog" celebrated  its 2nd anniversary this week. Many thanks to all of my loyal and interested readers. I appreciate your support, comments. and interaction. My hope in writing VintageGardenGal, is that I can help, inspire, and provide you tips on intermingling more garden into your own lifestyle. Please tell your friends. Thank you!

The Green Way to Lose a Lawn

Photo Courtesy, Janet Loughrey When I saw this piece recently highlighted on the witty garden blog, Garden Rant, who in turn, saw it originally on Sunset's fabulous garden blog, Fresh Dirt, it was another "aha" moment for me. It is worth mentioning yet again. How many of you want to "lose your lawn" and transform it into a more sustainable garden bed? You can do it in a very simple green organic way.

On Sunset's Fresh Dirt blog, contributing editor Jim McCausland walks us through the step-by-step method, Portland Landscape Designer Margaret de Haas van Dorsser, uses to magically transform a lawn into a new garden bed simply by way of "composting" on top of your lawn and designated new garden bed, using layers of newspaper, manure, and a little time, Turn Your Lawn Into A Flower Bed. This is ingenious. No more hiring someone, adding chemicals, intensive labor, and fighting of missed seeds or grass. You can do it yourself, in a very safe green organic way, and it is easy on your pocketbook, too.

I'm just amazed at how effective green, simple, organic methods and tips work for your garden. It takes a little bit of digging, no pun intended, to find a simple, green, organic solution but the rewards are worth it. Before you start a new garden project try researching for a green organic simple solution. Chances are you will find one, and you will be be very surprised and pleased. Please comment if you have tried this method of transforming your lawn into a garden bed. Please share if you are on the band wagon to reduce your lawn area.

Ten Ways Compost Benefits Your Soil

The Many Surprising Benefits of Compost As gardeners we all know without healthy soil, there will be no beautiful healthy garden. It's just that simple. What better way to ensure healthy soil then backyard composting. Don't laugh, but there is something magical about backyard composting. It is something akin to the "sum is greater than the parts", or two separate delicious ingredients will never compare as well alone, as when complemented and combined together as one.

As I have mentioned before, backyard composting can be paralleled to making a vegetarian recipe. It is equal parts of layered greens and browns, add water to keep moist, and turn frequently to aerate. For more detailed information, please go to VGG related post, How To Compost In Your Backyard.

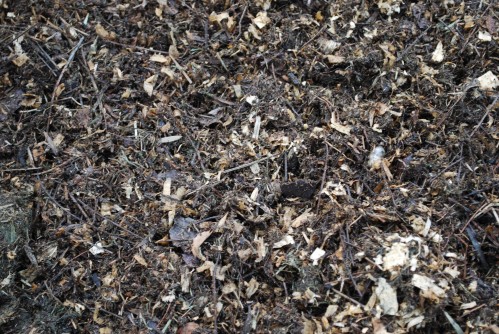
Here are examples of but not limited to, what is regularly in my compost bin. I add egg shells from my beautiful eggs my hens have laid. I add raked leaves from our trees that I cherish in our garden. I add my spent coffee grinds and recycled coffee filter from the aromatic French Roast coffee I enjoy drinking each morning. I add fresh grass clippings from our lawn. I add sweet potato peels and green bean tips from an evening meal preparation. I add my chicken manure as an extra bonus.

Ten Ways Compost Benefits Your Soil and Ultimately Your Garden: -It improves the soil structure by causing mineral particles in your soil to naturally clump together. -It improves soil ability to hold moisture, and means less watering. -It improves soil aeration and the ability to carry oxygen to your plant's roots. -It acts as an anchor to hold in soil nutrients, and not allow them to wash away with ground water. -It increases the number of beneficial microorganisms and worms in your soil. -It has the ability to neutralize acidic soils and acidifies alkaline soils, this is big. -It has the ability to consume harmful fungi spores, if present. -It introduces trace elements often hard to add, and in proper amounts to your soil. -It kills harmful pathogens in the soil, which keeps your plants and garden healthy. -It creates a healthy environment for healthy plants to thrive, and inhibits weed growth.

Your compost is a custom mixture, an interesting by-product of your life. All of these ingredients throughly combined become an organic rich humus with incredible benefits to your soil, garden, plants, trees, and yard.

Besides the many advantageous perks of adding compost to your soil, composting benefits your pocketbook, and piece of mind. Please share if you compost now. Please comment on what got you started composting? What benefits have you seen in your garden since composting?

For those of you in the San Diego area, there are "Free Composting Workshops" offered this spring through Solana Center for Environmental Innovation. Pre-register online at Solana Center for Environmental Innovation or (tel) (760) 436-7986 x222

Go Green With Gophers

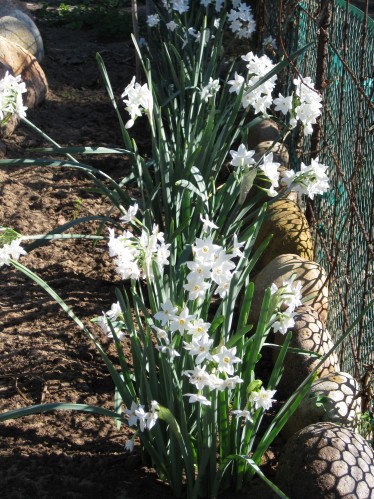
Blooming Paperwhites Dancing In The Sunlight I can't say enough about the effectiveness of combating gophers "the green way" with bulbs. I owe my good friends at Easy To Grow Bulbs for the "aha" moment, when I learned that planting any type of jonquil, paperwhite, or daffodil bulb, in a somewhat strategic mass planting in your yard and garden will effectively deter gophers in a very green and very beautiful organic way. It is a gopher solution that is simple and appealing.

Last year I wrote about the benefit of planting bulbs to deter gophers around my chicken coop in the related VGG post, Narcissus Bulbs Naturally Deter Gophers, and how effective it has been. I also planted bulbs around the perimeter of my potager to deter any gopher invasion, as shown in the photo above.

Jonquil, paperwhite, and daffodil bulbs once planted in the ground send out a year-round message to deter gophers, rabbits, and even deer in their immediate area. These particular bulbs send out a "toxic fragrance" or odor that animals sense even without biting into a bulb. However, if these bulbs are bitten into, they have the capability to burn a gopher's tender mouth and cheek tissues. The result is a natural tendency for gophers to move away from the area where you have planted your bulbs, hence limiting their food source, and population. It takes a little while, but it really works.

I love this green solution because it is humane to wildlife, your bulbs look fantastic when blooming, and they bloom year after year. Your initial investment is your time involved planting your bulbs, and a generous amount of bulbs planted in your gopher problem-related area. Plant your bulbs one after another in a line 3"-4" apart, or planted randomly throughout a flower bed amongst your other plants. Once your bulbs bloom, cut them back after they are spent and dried. You won't see them for the rest of the year, yet they are sending out their gopher-deterrent message year-round.

Please share how you combat gophers in your garden and yard. Do you have any other green solutions for gophers?

How To Compost In Your Backyard

Compost Bin And Ready Compost

Would you like to do something great for your garden, rewarding for you, and green for planet earth? It is called composting. It is very easy to get started. One, you save money on conserving water and not having to buy commercial fertilizers and soil amendments. Two, you enhance your soil health, fertility, and inhibit weed growth. Three, your gardens will require less water because the soil is able to retain water moisture more efficiently. Four, by composting and recycling, less of all of this is going into land fills, and the organic humus material is going back into your gardens for your benefit. Does your city have a "Compost Bin Subsidy Program"? See below.

Everyday I add to my compost, by following my kitchen- to chicken coop- to compost bin routine. First, by my kitchen sink corner, I keep a little open triangle plastic container with drain holes. In it goes my brewed coffee grains and filter, fruit and vegetable clippings, etc. Each morning when I open up my chicken coop for the day, I skim my chicken manure box, adding chicken manure and some pine shaving bedding to the mix. I put all of that in my compost, and layer it with grass clippings, which we heap in a pile outside of our compost bins, after mowing our lawn.

I layer my compost bin with my kitchen additions, chicken manure, leaves from the yard, and grass clippings. The smaller the pieces you add to your compost, the quicker your added materials will break down into compost. I make sure my compost bin mixture is moist. Continue to add water if your compost bin mixture is dry, and rotate it every few weeks with a pitch fork to aerate it. In a matter of 6-12 weeks, especially if you keep your compost bin in a partly shady area and moist, microorganisms break down these materials and create an extremely rich-nutrient dark organic mixture.

The formula for composting is to use about 50% greens, which is the nitrogen or the fire, and 50% browns, which is the carbon or the fuel. This formula does not have to be exact. With the addition of water and oxygen these two elements begin to breakdown and create heat. You might want to splurge and buy a compost thermometer which has a long stem to poke down into the heart of your compost bin, and read the temperature. You want your compost pile up around 120-150 degrees F, to start the decomposition process and kill any weed seeds, etc. Eventually your compost will stop heating up, after it has been turned. This means your compost is nearly ready, and it will benefit by leaving it be, for a few weeks more.

Greens are fruit and vegetable clippings, fresh grass clippings, yard trimmings, egg shells, tea bags, coffee grinds and filters, and breads. Manure is nitrogen, and also considered greens, which is an extra bonus to your compost, but you must add other green to your mixture other than manure. Horse, cow, sheep, and chicken manure are wonderful to use. Be mindful that manure can be "hot", as in potential to burn your plants, if not composted adequately and given time to break down.

Browns are dried leaves, wood materials, ground up branches and twigs, bark, straw, hay, pine shavings, sawdust, shredded paper, and wood ashes. Some browns take a long time to break down such as pine needles, so I do not include them.

What does not go into your compost bin. Think of your compost as vegetarian, therefore no meat, fish, poultry, bones, oils, lard, grease, dairy products. No dog or cat manure, or your cat litter box fill. No treated wood products, charcoal or pressed-log ashes. If you are unsure of something, leave it out.

Space required for composting is about a 3' square area. I have three bins going at one time, so I have more area devoted to composting. Don't forget about the potential for composting at school, or work, too. You want an area which is partially shady spot, and one which is easy to maneuver around in. Locate your compost bin in a "tucked away" but convenient area.

Compost bins can be home-made with simple materials such as stacked pallets, or quarter inch wire mesh 12' long, wrapped in a circle, and held together with a hook and eye at the top and bottom. There are also plans available on the Internet to make them, or manufactured bins available for sale at nurseries, and mail-order.

If you want to start backyard composting, check with your city first to see if they subsidize a "compost bin program". For instance, my city, Encinitas, has been quite proactive in recyling, compost workshops, and encourages residents to compost by subsidizing "Smith & Hawken" compost bins, http://www.smithandhawken.com/catalog/product.jsp?productId=prod21199&categoryId=cat240046p&sku=21199 that normally retail for $129, for only $35 each, limit two per year/per Encinitas household. These compost bins are available for non-Encinitas residents too, for a special non-profit reduced price, price and availability is subject to change. For further information visit, www.solanacenter.org or call, (760) 436-7986, x222.

The City of Encinitas has set aside funds for this program, and has had this program in place for many years now. If your city does not have a "Compost Bin Subsidy Program" like Encinitas, contact your city and ask for one. Make your voice heard. Start with the "Recycling Department" within your city. Does your city have a great "green" program in place, that you would like to share? Do you know of other benefits of composting that haven't been mentioned? Please share your comments.

Composting has made gardening easier for me. It is so delightful to see my gardens flourishing, and every time I dig into my soil, there is another good sign, an abundance of worms.

Prep Your Garden Tools For Spring

Last year my husband, John, and I were featured in an article called "Grow Greener" highlighting our flower/vegetable gardens, and organic practices in, Nature's Garden magazine, Spring 2008, http://www.debraprinzing.com/articles.php?article_id=40, written by friend, Debra Prinzing, an incredible garden and design features writer. See below, for more information on Debra. For this article, she asked me my "top ten healthy garden practices", and the last one I chose was "order before beauty", which Debra so aptly penned, "Chores Have Their Rewards".

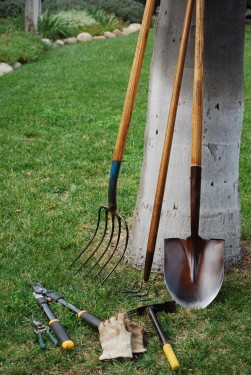
One of the chores I was particularly thinking about, was caring for your tools. Tools should always be cleaned, dried, and stored away in an orderly manner. If you have the due diligence, go one step further and wrap clean rags or towels around your tool heads before stowing away. Spring is especially a great time to prep your garden tools and have them ready, for all of your busy gardening needs, so you can "hit the dirt running".

Take a good look at your tool inventory and their condition. Do you know where your favorite tools are? Are your tools clean, or a bit rusty? If so, deep clean and lubricate them. Do they seem dull when using, or do they still have their sharp edge? Make sure your tools are sharp, it will save you physically. Are your tool handles rough or soft to the touch? If rough, lightly sand your wood handle tools with fine sandpaper, and apply a generous amount of linseed oil with a soft cloth. If the oil absorbs quickly, reapply. Your tool handles will be as soft as velvet and a treat to work with. Properly cared for tools can last generations, and can be handed down from one generation to the next budding generation of gardeners.

It is all the same, whether it is your personal life, your home, or your garden. If you are organized and tidy, you will be much more effective, efficient, and accomplish more effortlessly. You will soon experience the rewards. There is a great quote that reinforces this message. "When you do the things you have to do when you have to do them, the day will come when you can do the things you want to do when you want to do them."--Zig Ziglar, Author.

Debra Prinzing is a Southern California-based writer and lecturer who specializes in interiors, architecture, and landscape design themes. For more information and articles, please visit her website, www.debraprinzing.com, and her blog, www.shedstyle.com. Her latest book, with William Wright, architectural and interior design photographer, is called "Stylish Sheds and Elegant Hideways".