Posts in Recipes
Best Sweet Tart Dough Recipe Ever
Summer Berry Tart Before Demerara Finishing Sugar

Summer Berry Tart Before Demerara Finishing Sugar

I have made a lot of tart recipes in my time, some simple, some complicated. This recipe from Alice Medrich printed in the Wall Street Journal, Summer 2020, is the easiest and tastiest sweet tart dough recipe you will ever need. No cooling the dough or rolling out the dough. It is the best. Use your favorite tart filling, but keep this tart dough recipe in your recipe arsenal.

Easy No-Roll Tart Crust

This smart recipe from Alice Medrich produces the easiest, most delicious tart crust you will ever make. Press it into a tart pan with a removable bottom for a tidy crust with beautifully fluted sides, or push it into a pie plate for a more homespun look. Either way, this crust is remarkably good for something so simple to prepare: buttery, intensely crunchy and deeply flavorful. This immensely accommodating recipe works with either granulated or brown sugar; the latter just gives the crust slightly more complex caramelized taste.

TOTAL TIME: 40 minutes

MAKES: Makes 1 (9½-inch) tart crust or (9-inch) pie crust

KATE SEARS FOR THE WALL STREET JOURNAL, FOOD STYLING BY LIZA JERNOW

Ingredients

  • 8 tablespoons unsalted butter, melted

  • ¼ cup granulated sugar or brown sugar

  • ¼ teaspoon salt

  • ¾ teaspoon pure vanilla extract

  • 1 cup plus 2 tablespoons unbleached all-purpose flour

Directions

  1. Position a rack in the lower third of the oven and preheat to 350 degrees.

  2. In a medium bowl, combine butter, sugar, salt and vanilla. Add flour and mix just until well blended. If the dough seems too soft, let it stand a few minutes to firm up.

  3. Press dough evenly over the bottom and up the sides of a 91/2 -inch tart pan with a removable bottom or a 9-inch pie plate to make a thin, even layer. Press dough squarely into corners of pan to avoid extra-thick edges. If using a pie plate, press crust up the sides but not over the rim. (Crust can be prepared 2-3 days ahead to this point, wrapped and refrigerated. Bring to room temperature before baking.)

  4. Place pan on a baking sheet. Bake until the crust is fully golden brown all over, 20-25 minutes. If the crust puffs up during baking, gently press it down with the back of a fork and prick it a few times. Set pan on a rack to cool. (Once crust is completely cool, it can be kept at room temperature, wrapped airtight, at least 3 days.)

—Adapted from “Sinfully Easy Delicious Desserts” by Alice Medrich


Below is the filling recipe that went along with the above Easy No Roll Tart Crust by Alice Medrich, which is also fantastic. I have made it with strawberries, but also many other fresh fruits. In winter months you could do a lemon curd or chocolate filling without the mascarpone base. Enjoy!


Simplest Strawberry Tart

This is the simplest tart you’ll ever make, and it’s a stunner. Fill a baked crust with sweetened mascarpone and top with the ripest strawberries you can find. Other berries will work, too; so will halved fresh figs. Sprinkle it with Demerara sugar for seasoning and crunch. That’s it.

TOTAL TIME: 50 minutes

MAKES: 1 (9½-inch) tart

KATE SEARS FOR THE WALL STREET JOURNAL, FOOD STYLING BY LIZA JERNOW

Ingredients

  • 1 Easy No-Roll Tart Crust (recipe above), baked in a 9½ -inch tart pan with a removable bottom and left in pan after baking

  • 1 cup (8 ounces) mascarpone

  • 4 teaspoons granulated sugar

  • ½ teaspoon pure vanilla extract

  • 2 teaspoons unsalted butter, very soft, for sog-proofing (optional)

  • 2 pints ripe strawberries, rinsed, hulled, and halved if large, and patted dry

  • 2 tablespoons Demerara sugar

Directions

  1. In a small bowl, mix mascarpone with 4 teaspoons sugar and vanilla.

  2. If you will not be serving the tart within 3-4 hours, sog-proof the crust by spreading the bottom with the thinnest-possible layer of soft butter. Chill crust to set butter, 10-15 minutes, before adding mascarpone mixture.

  3. Spread mascarpone evenly over crust. Begin arranging berries, as close together as possible, around edges of tart and work toward the middle. Remove tart from pan and transfer to a platter. Refrigerate unless serving within 2 hours. Before serving, sprinkle with Demerara sugar. Tart is best on the first day but still very good on day two.

—Adapted from “Sinfully Easy Delicious Desserts” by Alice Medrich


Do you have a favorite “go to” tart recipe? If you make this tart recipe, and like it. Let me hear from you!

Bon Appétit and Bon Weekend….Bonnie

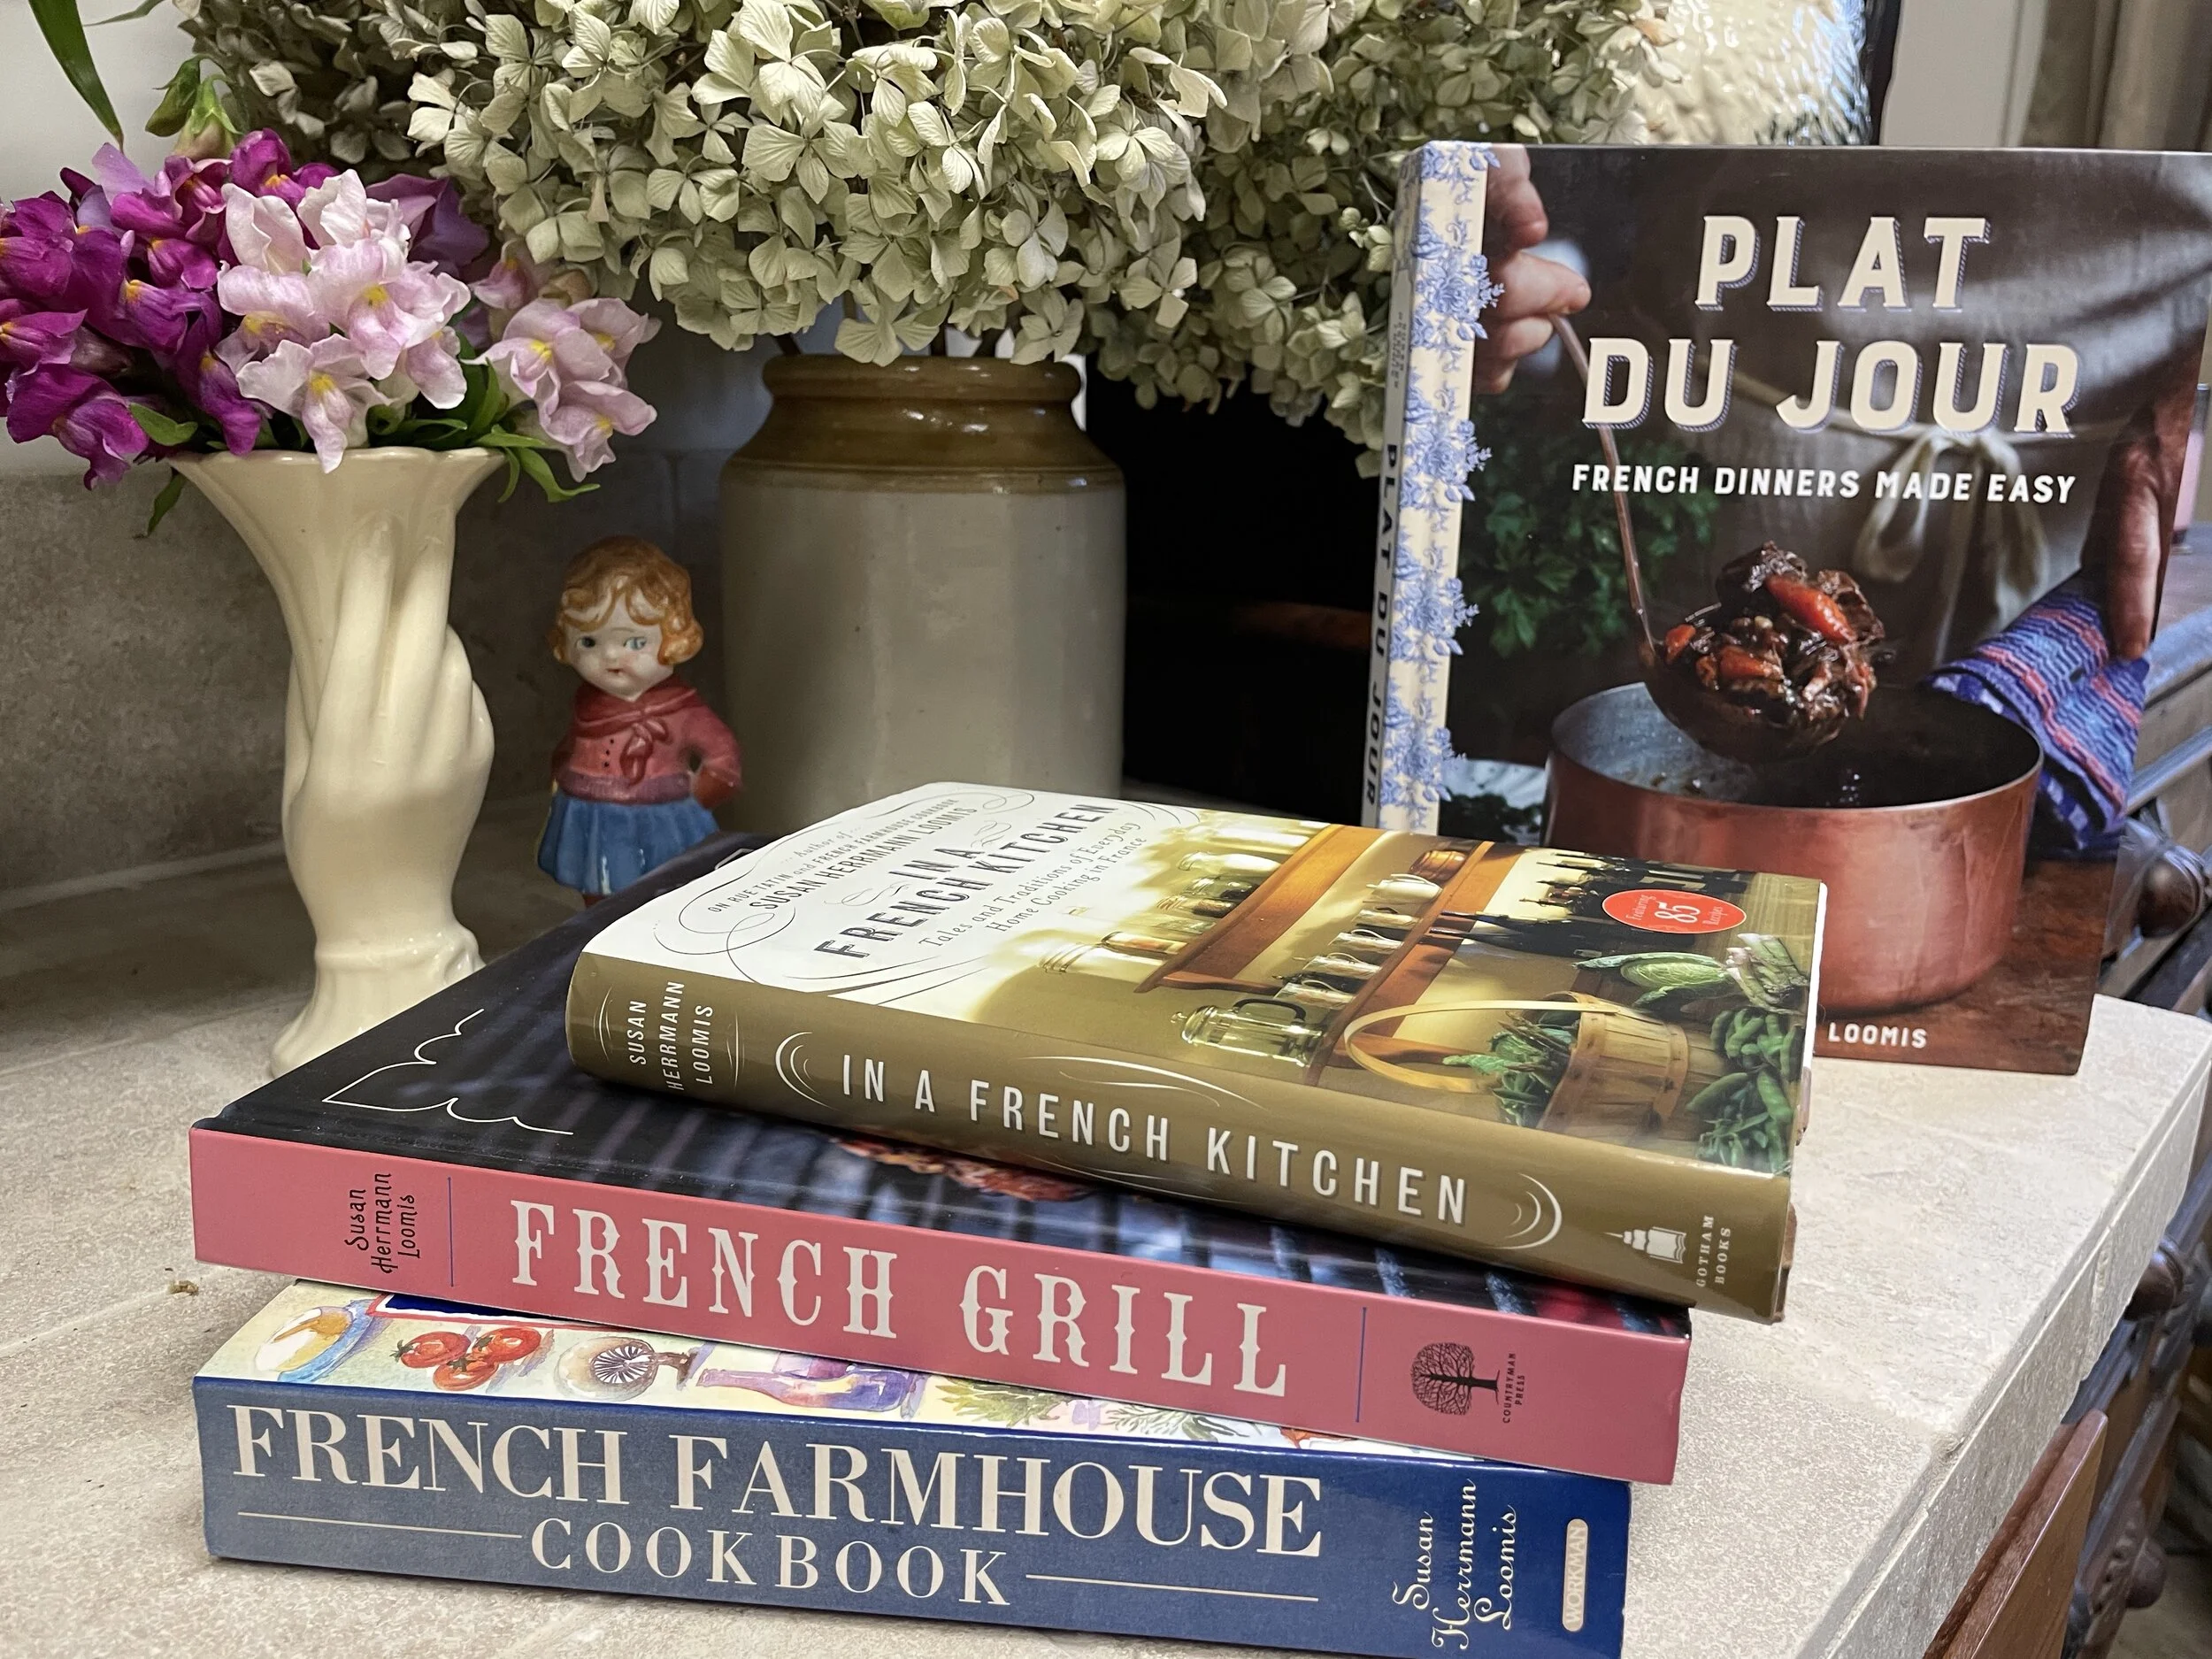
Plat du Jour by Susan Herrmann Loomis
Susan Herrmann Loomis’ Latest Cookbook, Plat du Jour

Susan Herrmann Loomis’ Latest Cookbook, Plat du Jour

I have several cookbooks by Susan Herrmann Loomis, and have really enjoyed them over the years. An American expat who has successfully navigated the fine art of being French, cooking the French way, sharing with us French food secrets, and reinventing herself through culinary as her medium. Her cookbooks read like novels, always sharing the story, the custom, and the technique behind the recipe.

Her latest cookbook, Plat du Jour, French Dinners Made Easy, Countryman Press 2021, focuses on seasonal recipes and ingredients, and ultimately daily dishes that inspire chefs to feature and post on their menu boards.

Susan Herrmann Loomis has a new website, Dancing Tomatoes, and YouTube Channel Dancing Tomatoes, currently highlighting many of the recipes in her new cookbook, Plat du Jour. Below are a few videos. The first video is an introduction to Dancing Tomatoes, her new YouTube channel, and how it came about. The second video walks us through her King Henry Soup. I love her demonstration of how to dice an onion and a shallot. You might also enjoy Shannon Able’s, The Simply Luxurious Life podcast #300 with Susan Herrmann Loomis. Enjoy!


I met Susan Herrmann Loomis at her book signing event in 2015 for her then new cookbook, In A French Kitchen, at Melissa’s Produce in Los Angeles. Taking one of her Paris cooking classes has never quite worked out with my travel itineraries. Now with her Dancing Tomatoes videos, her classes are a click away!

Please share if you enjoy Susan Herrmann Loomis recipes and cookbooks.

Bon Appétit and Bon Weekend….Bonnie

Melissa’s Produce, Los Angeles 2015

Melissa’s Produce, Los Angeles 2015

Elegant Hummingbird Cake

Elegant Hummingbird Cake

This is not a French dessert, but one that originates in this country. It is an elegant fruit cake with a decadent cream cheese frosting. I don’t know the specific origin of this recipe, only that my parents shared it with me years ago from their Missouri area. I can easily imagine this as a featured recipe out of Southern Living magazine. See recipe below.

I think of it as a carrot cake, without any carrots. It is super moist and delightful with combined flavors of crushed pineapple, bananas, and applesauce. The cream cream frosting is a nice yummy addition, and covers the cake nicely. Everyone asks for the recipe!

Recipe Notes: I have made this cake frequently over the years, for birthdays, teas, and special occasions. I now prefer to do a three-layer 8” cake, rather than the two-layer 9” cake, but both work fine. I also freeze ripe bananas and keep them in the freezer, and allow time to let them thaw before making the cake. So chopped bananas work well, or mashed bananas thawed from the freezer. I also don’t always use chopped nuts in the cake, or for garnish on the top. It is your preference. Enjoy!

A Slice of Celebration Heaven

A Slice of Celebration Heaven


Hummingbird Cake


Ingredients:

1-1/2 cups sugar

1-1/2 cups all-purpose flour

1 tsp. baking soda

¼ tsp. salt

¼ tsp. cinnamon

1-8oz. can crushed pineapple—juice packed, drained

½ cup canola oil

4 eggs slightly beaten

1 tsp. vanilla

1 cup chopped bananas

1 cup chunky-style applesauce

2/3 cup chopped walnuts, toasted


Directions:

Grease and lightly flour two 9” round cake pans. Place a circular parchment paper fitting each pan on top of greased and floured cake pans for ease of removing baked cakes. Set pans aside.


In a large mixing bowl, combine the sugar, flour, baking soda, salt, and cinnamon. Add drained pineapple, oil, eggs, and vanilla. Beat with an electric mixer until combined, scraping the sides of the bowl occasionally. Stir in bananas, applesauce, and walnuts. Divide batter between two prepared pans.


Bake in 350 degree F. oven about 35 minutes, or until the top springs back when lightly touched. Cool cake layers on wire racks for 10 minutes. Remove from pans, cool thoroughly on wire racks. Prepare the Cream Cheese Frosting and frost cake.


Cream Cheese Frosting


In a large mixing bowl, beat one 8oz. package cream cheese (softened), ½ cup butter (softened), and 1 tsp. vanilla with an electric mixer until light and fluffy. Gradually add 5 cups of sifted powdered sugar, beating until smooth and spread consistency.


Ice cake in one direction, trying not to get cake crumbs in the icing. Ice top of first layer of cake, add second cake layer, finish icing cake top and sides.


Press 1-1/2 cups finely chopped pecans, toasted into the sides of the cake. Sprinkle 2 tablespoons of finely chopped pecans on top of the cake. (I usually just cover the top of cake with toasted pecans, and not the sides.) Enjoy!!


Do you have a favorite cake or dessert you make for your special celebrations? For more dessert recipes and related dessert posts from my blog, please go to dessert recipes. If you make this Hummingbird Cake recipe, please leave a comment, or tag me on Instagram. I love to hear from you!

Bon Weekend…..Bonnie

Valentine's Day Tablescaping
Say Love With This Centerpiece

Say Love With This Centerpiece

Usually around Valentine’s Day we see long-stemmed roses for celebration, but this simple centerpiece is just as striking and dramatic. I used an ivory rose, but with your own tablescaping you can make this centerpiece with any color of your choice—a soft lavender, perhaps a dusty pink, or the classic red rose.

Don’t forget to save out a rose for your loved ones to wear in a shirt pocket, lapel, or secured behind an ear.

Simple To Put Together

Simple To Put Together

How To Assemble: Find fresh roses the color of your choice. Remove the outside petals of your roses. Have your waterproof vessel shape and choice on hand. Be sure to protect your buffet or table adequately from moisture. I confess I did this arrangement years ago, before it became clear not to use toxic floral foam. Instead of floral foam, great alternatives are molded chicken wire to your vessel shape, lattice style floral tape across your desired vessel, or even using a floral frog (vintage or new) secured on the bottom of your vessel with waterproof floral frog clay. All of these supplies generally can be found at craft stores, floral supply stores, or online. Cut your roses short on an angle to the desired height. Fill in foliage laterally from the garden with perhaps, juniper, boxwood, or rosemary clippings. Keep filling in foliage until you are satisfied. In time, your roses will open up further, meeting each other.

Add in the Foliage Until Little of Your Vessel Shows

Add in the Foliage Until Little of Your Vessel Shows


I have more great Valentine’s Day tablescaping tips for you with these two short fantastic Instagram videos. Both of these videos remind you not to forget the candles, the music, chocolate, champagne and have fun!

Sarah Anderson, Founder of Chateau Sonoma, a fantastic Frenchie shop now located on the Sonoma Plaza in Sonoma. www.chateausonoma.com. Where in the world did Sarah find her champagne glasses.

Robyns_French Nest, Robyn Huff out of Florida, www.robynsfrenchnest.com, you will love her French passion for vintage. Robyn created her tablescape for about $10.00, some petite DIY, and a few vintage things she had. Amazing!


Valentine’s Day has been on my mind all month! Remember February is Love! It is just one of these years when you want to hold your loved ones close and embrace the love, and present moment that surrounds you. I will be making my Dark Chocolate Terrine with Orange Sauce.

Wishing you a Bon Weekend, and a very memorable Valentine’s Day filled with love……Blessings, Bonnie


February is Love
Red Ranunculus

Red Ranunculus

February is the month of love, and let this love carry you throughout this year. Surround yourself with those you love, and what you love. Even if you can’t see loved ones in person, you can still reach out to them. Friends and family will feel the love from your heart. Simple gestures go a long way, whether it is beautiful flowers, something chocolate, a sweet note, a sincere compliment, love quotes, a little humor, or even a kiss! Love makes the world go round.

IMG_5920.JPG
 

Mom’s Brownies

This is one of my Mom’s recipes that I love, and have made for years. This recipe creates a soft, chewy, rich brownie which disappears fast! It calls for a scant 1/2 cup of sifted flour. Be sure and use quality bittersweet chocolate and vanilla extract. Be careful not to overbake the brownies. Thanks Mom!

Brownie Ingredients:

1/2 cup sifted all purpose flour

1/8 teaspoon baking powder

1/8 teaspoon salt

1/2 cup butter softened

1 cup sugar

2 eggs

2 ounces of bittersweet chocolate melted

1/2 teaspoon vanilla

1 cup chopped walnuts (optional)

Preheat you oven at 325 F. degrees. Grease an 8” x 8” x 2” pan. Sift flour with baking powder and salt in a small bowl. With an electric mixer beat butter with sugar until very light and fluffy. Beat in eggs one at a time until very light. Beat in melted chocolate and vanilla at low speed, blend in flour mixture, just until combined. Turn into pan, spread evenly. Bake for 30 minutes. Let cool completely. Frost brownies.

Frosting Ingredients:

1 ounce bittersweet chocolate melted

1 cup powdered sugar

1 tablespoon softened butter

1 teaspoon vanilla

Blend together. Can add a dash of cream to make frosting smoother.

 
The Little Lion Cafe, Ocean Beach

The Little Lion Cafe, Ocean Beach

Champagne, or maybe cappuccino?

IMG_5963.JPG
 
IMG_3722.jpg
 
DSC_0632.jpg


A Perfect Dessert to Celebrate Valentine's Day
A Table Set for Valentine’s Celebration

A Table Set for Valentine’s Celebration

A few years ago I hosted some events around Valentine’s Day. I tried to create a special menu with the theme, “Love is Endlessly Delicious.” Many things I remember with fondness, but what I now associate Valentine’s Day with is Ina Garten’s Dark Chocolate Terrine with Orange Sauce the recipe I made for dessert. Wow, it is a show stopper!

This recipe is from Ina Garten Make it Ahead (2014) cookbook, which is one of my favorite cookbooks. The terrine can be prepared and made ahead, along with the orange sauce. Not a chocolate mousse, not a cake, it is like a decadent chocolate pâté. Garten channels two similar recipes, one from Thomas Keller’s French Laundry and the second, from the famous Taillevent restaurant in Paris, plus adding her Barefoot Contessa spin on it. Marvelous! It is a perfect dessert to celebrate Valentine’s Day!

 
Making the Dark Chocolate Terrine

Making the Dark Chocolate Terrine


Recipe Notes: Use the best chocolate you can find. Garten recommends Lindt bittersweet chocolate. I used Guittard bittersweet chocolate found at Sprouts, Cardiff Seaside Market, and other specialty grocery stores in our immediate area. Valrhona bittersweet chocolate is another great choice.

The dark chocolate terrine needs to chill for a minimum of 4 hours or overnight. Don’t forget the Orange Sauce made with a touch of Grand Marnier liqueur and cognac, which is a perfect complement to the flavor and presentation of the dark chocolate terrine. Lastly, sprinkle with some flaky sea salt. A hot, dry knife helps to make your slices easier. Run your knife over hot water, dry, and slice, repeat if necessary. Recipe makes 10 servings, perfect for sharing with loved ones.

Please share if you make something special for your loved ones on Valentine’s Day!

Sensational Sorrel

Garden Sorrel in My Potager

Garden Sorrel in My Potager

Sandwiched between my sage plant on the left and flourishing fava beans on the right is my bright green perennial sorrel plant in my potager. Sorrel is an herb that adds lemony flavor to salads, soups, and sauces. There are two types of sorrel: garden sorrel, Rumex acetosa, which I grow, and French sorrel, Rumex scutatus (or buckler sorrel). The two types are very different in appearance, but similar in flavor. Garden sorrel has large sword-like leaves and French sorrel has leaves almost shaped like that of an oak leaf and only reaches about 6'“ in height. If you have the room, try growing a patch in your garden. You can find sorrel in some specialty grocery stores and markets in the spring, but if you grow it in your garden in Southern California, it will thrive year-round.

 
Patricia Wells 1996 Cookbook with Sorrel Soup Recipe

Patricia Wells 1996 Cookbook with Sorrel Soup Recipe

Sorrel is such a sensational flavor, but there are two things to be aware of. When you cook, steam, or sauté sorrel leaves, it is like spinach, in that a huge amount of fresh leaves becomes a small wilted amount—so you need to use more initially than you might realize. Sorrel leaves when fresh are a bright happy green color, but can turn a sort of muddy green darker color when heated.

Patricia Wells has a great sorrel soup recipe below, where she shares a secret for retaining bright green sorrel color, from her friend, Chef Dieter Müller. Blend your pureed sorrel with room temperature butter first, and add it to the soup at the end of your cooking time. The soup retains its desirable green color. This elegant soup can be served hot or cold, and can be made with fresh watercress leaves as a nice substitute.


Amazing Sorrel Soup

Lovingly Adapted from Patricia Wells at Home in Provence

Ingredients:

3 ounces (90 grams) fresh sorrel leaves, stemmed, thoroughly washed, and dried

3 Tablespoons unsalted butter, at room temperature

2 Tablespoons extra-virgin olive oil

1/2 small onion, peeled and sliced into thin rounds

6 ounces (180 grams) starchy potatoes, peeled and diced

1 quart homemade Chicken or Vegetable Stock, or store bought

1 cup heavy cream

Sea salt and freshly ground white pepper to taste.


Directions:

1) In a food processor, puree the sorrel, pulsing on and off for 30 to 45 seconds. Add the butter and puree. Transfer to a small bowl, cover, and set aside in a cool area of the kitchen. Do not refrigerate, or the sorrel butter is likely to be too cold to add to the soup at the end.

2) In a large saucepan, heat the oil until it is hot but not smoking. Add the onion and sweat them over low heat until soft, 3 to 4 minutes. Add the potatoes and cook over low heat until golden, 10 to 15 minutes. Remember not to cook over too high a heat, or they will burn instead of coloring a beautiful golden brown.

3) Add the stock and simmer for about 20 minutes or until the potatoes are fully cooked. Stir in the heavy cream. Using an immersion mixer, puree the soup directly in the stock pot. A food processor can also be used. Return the soup to the stockpot if using a food processor. The potatoes will give thickness and body to the soup without detracting from the sorrel. Taste for seasoning. Just before serving, whisk the sorrel butter into the hot soup, taking care to mix thoroughly and quickly. Makes 4-6 servings.


If you like this blog, and want to share it with your friends. Sign up with your email for my blog posts, newsletters, and Instagram at www.bonniejomanion.com

Jim Dodge Chocolate Pecan Cake
A Chocolate Slice of Heaven

A Chocolate Slice of Heaven

A Chocolate Lover’s Dream Cake! This is a perfect chocolate cake for the holidays. It is dense, dreamy, and dramatic! Reminiscent of European desserts, it is sweet, but not too sweet, and the rich elegant chocolate flavor is first and foremost. It is a very rich cake, so dainty slices go a long way, especially if you are serving additional desserts for your occasion.

 
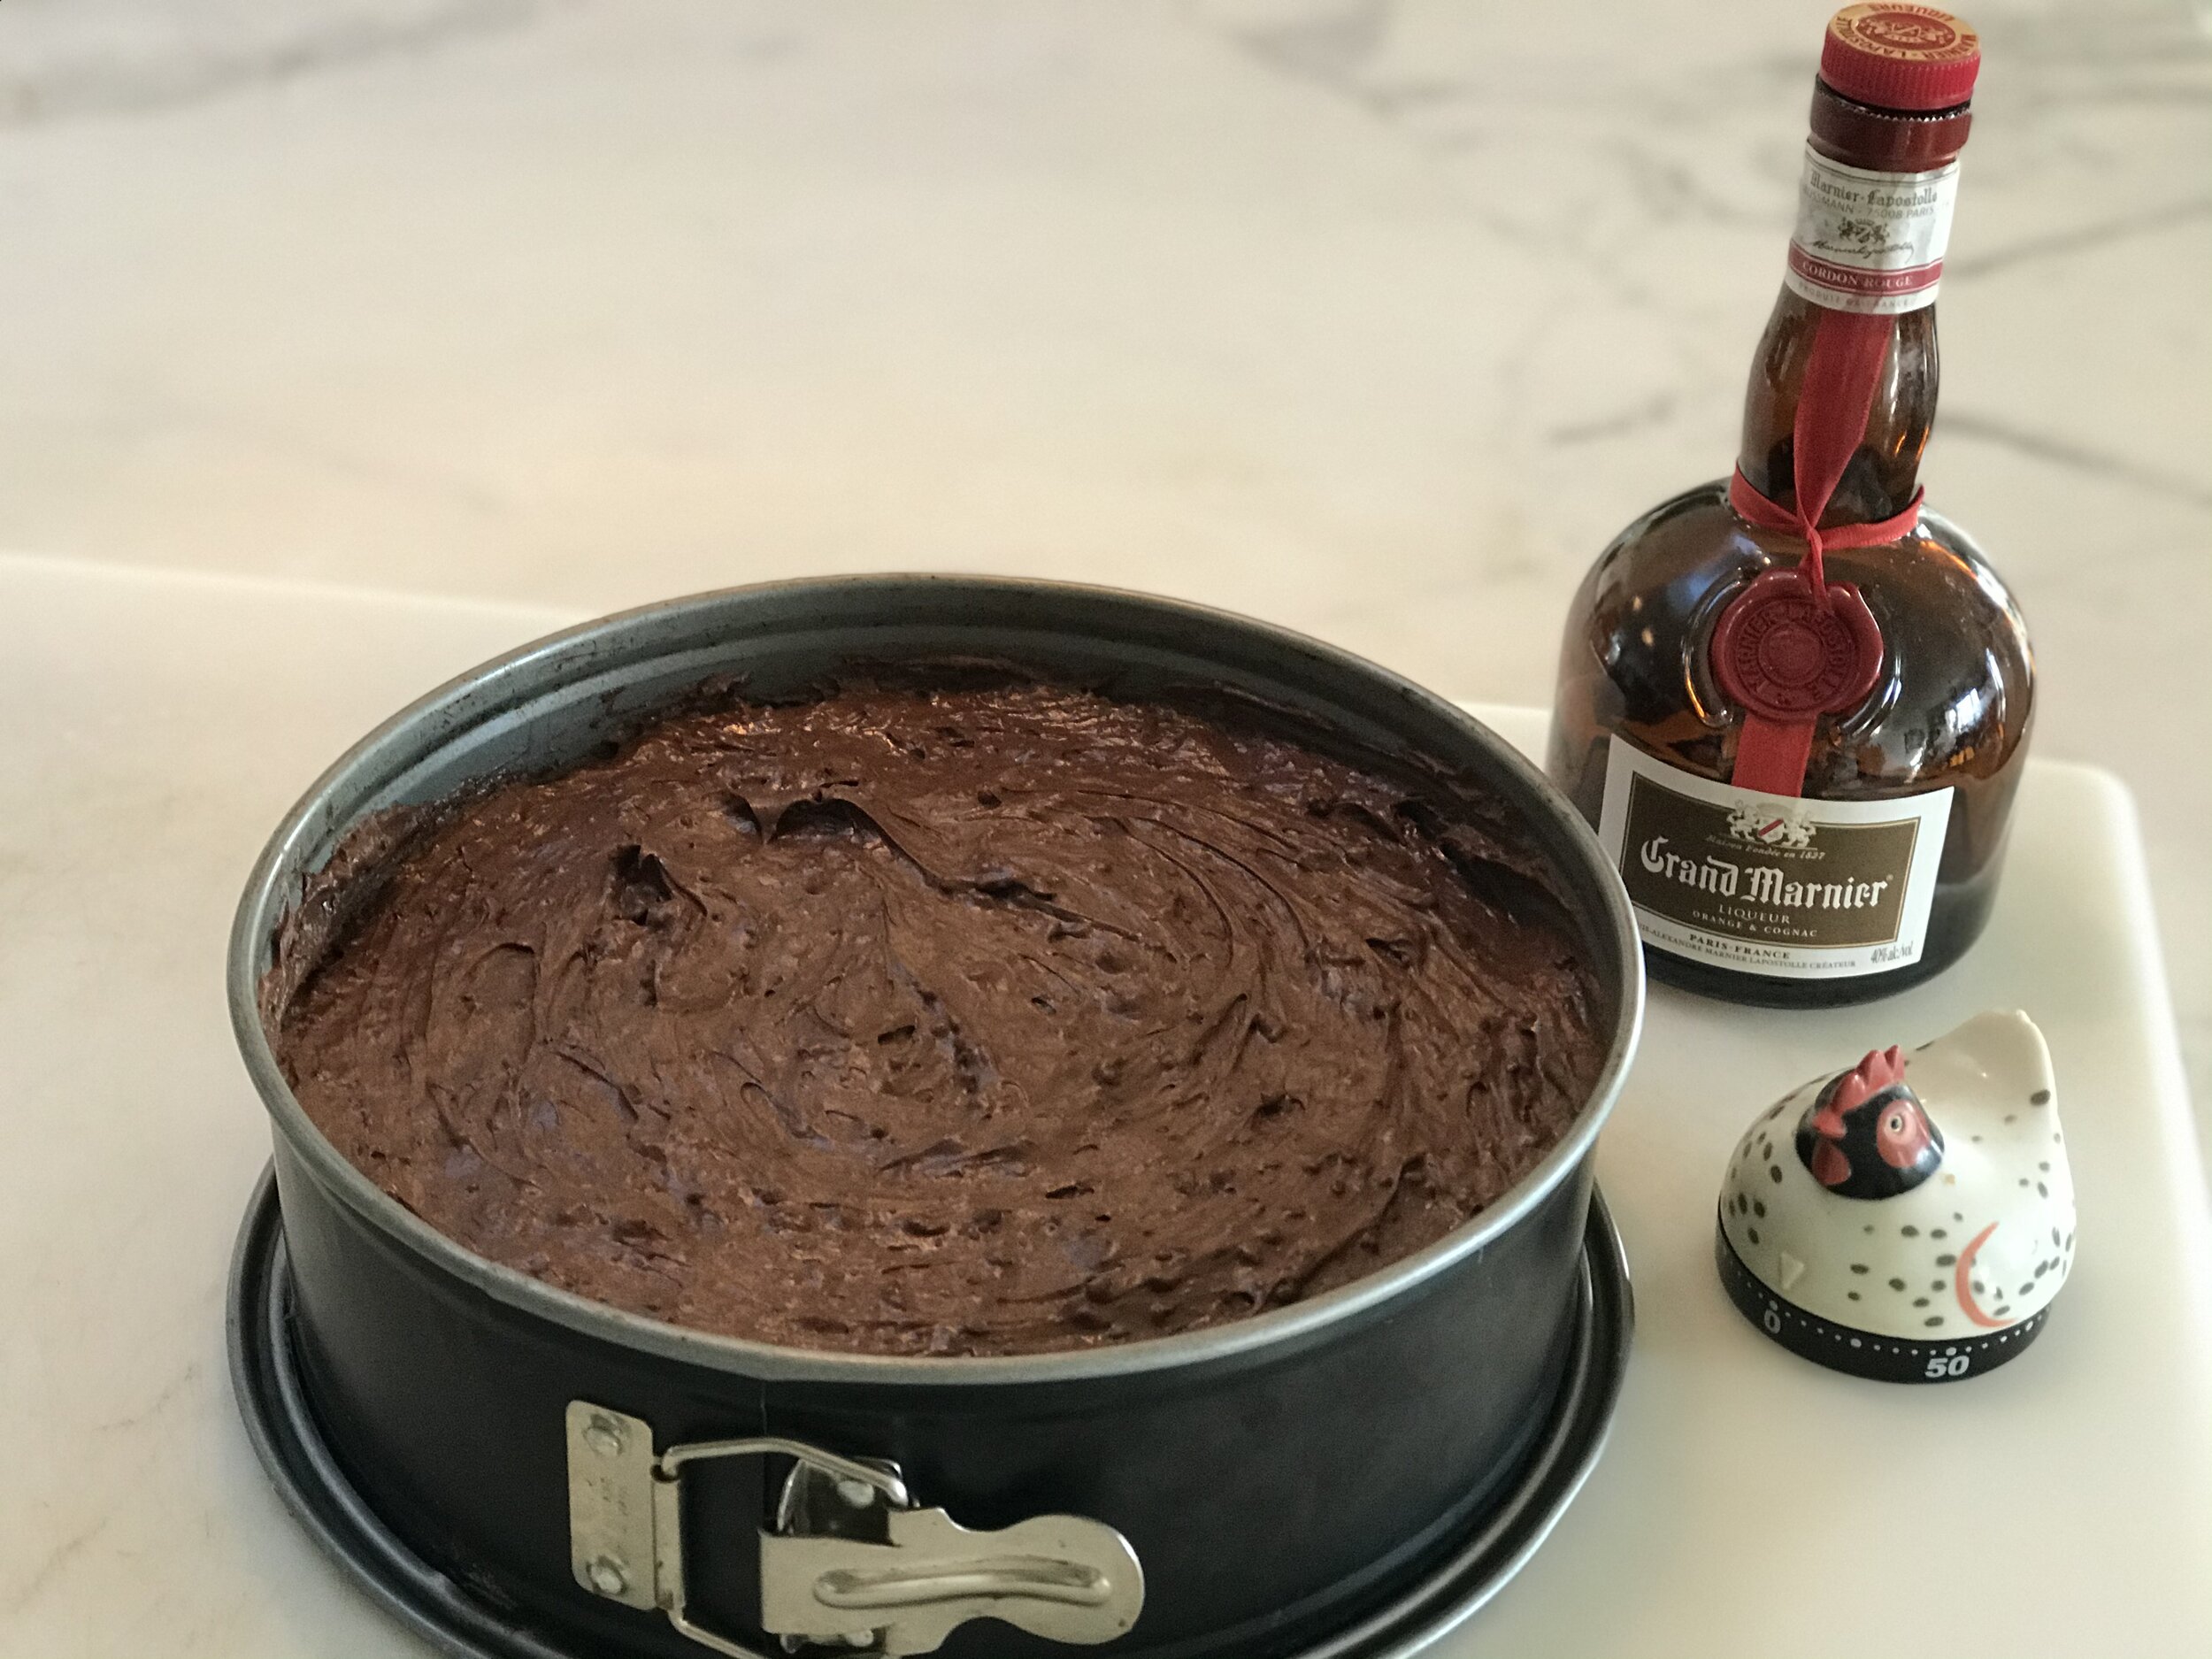
Springform Pan Ready for the Oven

Springform Pan Ready for the Oven

I originally blogged about this recipe back in 2010, Jim Dodge Chocolate Pecan Cake. I hadn’t made it for a couple of years, but remembered how delicious and easy it was to make. The original recipe has an optional 1/3 cup bourbon in it. Being bold this year I replaced the optional bourbon with 1/3 cup Grand Marnier, and added moist, sweet, dried orange slices as a finished top garnish. Wow! Another option you could try is replacing the 1/3 cup bourbon, with a teaspoon of dried Espresso coffee granules and 1/3 cup Kuhlúa.

 
Ready to Serve

Ready to Serve

Obviously, the chocolate in this recipe is very important. Use the best baking chocolate and unsweetened cocoa powder you can find. I used Guittard semi-sweet chocolate and Ghiradelli premium unsweetened cocoa powder for the body of the cake, and Guittard bittersweet chocolate for the glaze. You might be surprised to know that there is no flour in this recipe. Toasted pecans finely ground with a food processor replace the need for flour. Another surprise is the cake is immersed in a simmering water bath while baking. Enjoy!


Jim Dodge Chocolate Pecan Cake Recipe

Recipe Notes: The original recipe calls for coarsely chopped toasted pecans, but it is best to use a food processor to finely grind your pecans. You can add bourbon, Grand Marnier, and Kuhlúa as an option, or leave out entirely. Allow time to leave your cake in the springform pan overnight, after baking and before placing on your serving plate. Serve your cake at room temperature for optimum flavor.

Do you have a holiday dessert that is your family’s favorite? If you make this Jim Dodge Chocolate Pecan Cake, please comment and share!