Posts in Styling
Teak for the Table

Teak Containers Can Be Beautiful

Teak is not just for furniture anymore, teak has evolved into accessories for your garden, outdoor rooms, and patios, too. The same teak principles apply to teak accessories, in that they age to a beautiful gray patina, withstand weather, and overall are very durable.

If planting a teak container, you will want to line the inside container with a plastic bag or plastic lining before adding your soil, plant material, and moss. If you plant a succulent such as this Sticks on Fire (Red Pencil Tree), Euphorbia tirucalli, in the photo, this container will require little water to maintain it.

Besides plant containers, you can find versatile teak accessories for hanging on walls, serving bowls, trays, art objects, and the list goes on. One source for teak accessories is Teak Closeouts. 

Think teak for timeless and trouble-free.


Boxwood Bonus

We all know how beautiful boxwood can be clipped in a formal garden, but have you thought about using boxwood as literally a very "green" oasis for your floral arrangements? I have a dear friend who is very talented in creating magnificent floral arrangements from her garden. On a recent visit to her showcase garden, she showed me how to use her boxwood from her garden as a way to secure her flowers in their vases. Clipped boxwood anchors your flower stems, looks great especially in your clear vases, and is what I call "garden economizing"--free from your garden.

The added advantage of using boxwood is that it will keep for a long time in your vase, far outlasting your cut flowers. Simply cut boxwood pieces to your desired floral vase or container size. Arrange them under water until your vase is full of boxwood clippings, and next add your cut flowers. The boxwood will hold your flowers in the spot you place them. I love the look, very classic, very green, and very earth-friendly.

Please share if you use a green, alternative to oasis for your floral arrangements. Please comment on which boxwood your enjoy the most.

A Wreath For All Occasions

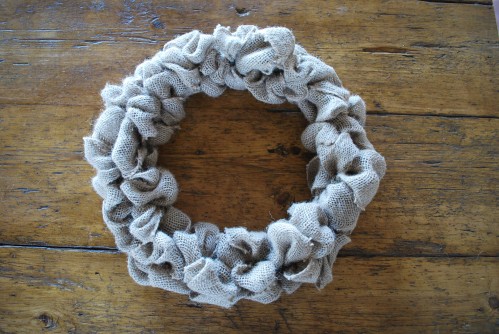
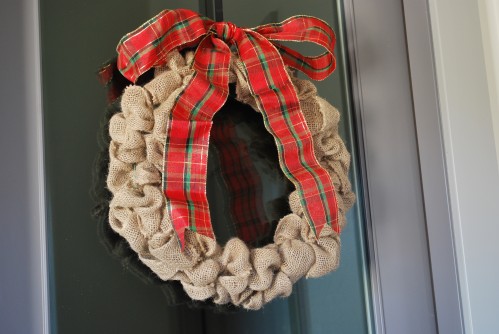
Rustic Burlap Wreath I love burlap as a medium, see my post, Beauty in Burlap for more ideas. Burlap is easily found in art and craft stores as a finished garland. Over the holidays I made this rustic burlap wreath and finished it with a plaid holiday ribbon. Now that the holidays are tucked away for the year, this beautifully textured wreath can become a "wreath for all occasions" simply by changing out its ribbon style or embellishment.
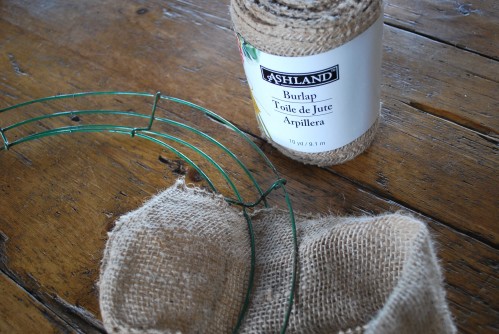
The wreath is simple to make, requiring little other than a wire four-ringed wreath form of your preferred size, a spool of 6" wide burlap garland that is 10'long, scissors, and a favorite ribbon of your choice.

Wire Wreath and Burlap Garland

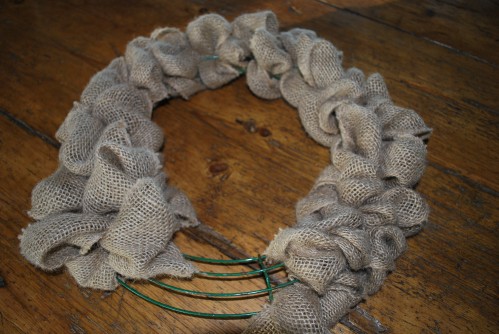
Begin by unraveling your entire 10' of burlap garland. Leaving a beginning tail which you will tuck in later, begin weaving your burlap garland through your wire form, first under, then over your wire. As you weave under and over your wire, pull out a loop of burlap each time you weave in and out. Create your loops the same size, which becomes your burlap form. Leave a tail at the end of your wreath, as in the beginning and tuck it into your wire wreath form to finish.

Nearly Completed Burlap Wreath

The burlap garland is cumbersome in the beginning with 10' to thread through the wires, but soon after the burlap wreath starts to take shape. Knobby loops begin defining the textural beauty of this wreath.

Copper Feather Ribbon

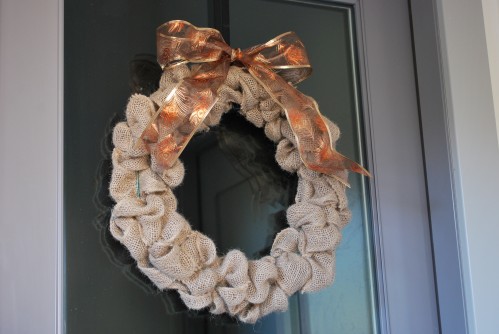
In celebration of my beautiful hens, I have my wreath currently adorned with a copper feather ribbon.

Wreath with Holiday Ribbon

Around the holidays, you can easily change the look of this wreath to a more holiday festive look. The same goes for spring with a pastel ribbon, or the fall with a black and white checked ribbon. You have unlimited possibilities with this wreath for all occasions. Don't forget that wreaths can dress up a window, or a candle and hurricane on a table, besides a special door.

Please share if you adorn a wreath for a special occasion other than the holidays. Please share what your favorite wreath.

Viva Verbena!

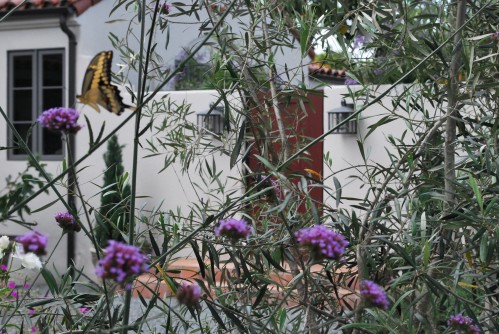
DSC_0460My new favorite perennial plant is Verbena bonariensis, also known as Purpletop Vervain. I planted it in mass on one side of my courtyard next to my olive trees and white iceberg roses, and I have really been enjoying it. It is very low maintenance with high "plant appeal."
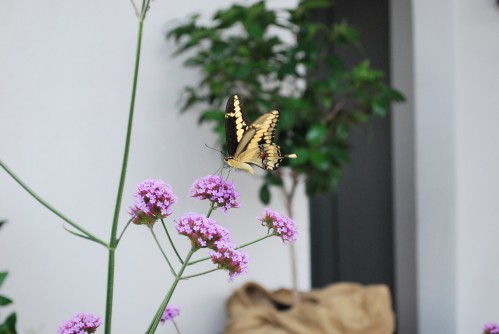
It is native to South American and has naturalized in California. It does best in USDA Zones 6-10, prefers sun, and little water. It is a tall structural plant, 4'-6' high and at least 2' wide at maturity. Yet it has this airy quality which brings lightness and motion to a garden setting rather than density. It has clusters of captivating lavender-hued flowers that bloom prolifically from summer to fall. It is an incredible magnet for butterflies and delightful birds such as hummingbirds and goldfinch as an added bonus. Verbena bonariensis can reseed easily and aggressively, so be careful where you plant it.

DSC_0467

There is even a dwarf version called Verbena bonariensis 'Little One' which reaches 18-24" high by 12-18"wide in size. A good source for both of these Verbenas is Cedros Gardens, (tel) (858) 792-8640, in the heart of Solana Beach's Cedros Design District.

Here are some tips for using Verbena bonairensis in your garden. Plant it in mass like I did, either as a background or in a foreground as it has such a nice "see-through" quality. It pairs well planted among roses, as mentioned in Carolyn Parker's everything rose blog, Rose Notes. Since it takes hot and dry conditions very well, think about planting it in your driest garden spots. I planted Verbena bonariensis "Little One' directly in my pea gravel around my water fountain. It looks like a cheery volunteer, yet adds interest and a dab of color. Or plant it in a dry spot along a flagstone pathway for a little bit of a surprise element for those walking by.

Please share if you have Verbena bonariensis in your garden. Please comment on how you have it planted and styled in your garden.

Nature is the Best Decorator

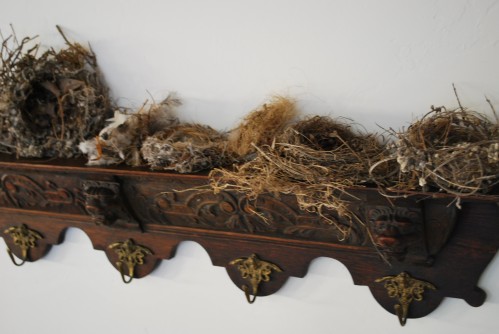
My Personal Bird's Nest Collection I collect bird nests from all over my garden. Sometimes a strong wind sends them to the ground. Thank goodness I find them empty, after the young birds have "flown the coop." I marvel at how well they are engineered. Some are large, and some are small. I recognize these nests are made from materials that come out of my garden. It gives me great joy to see the results of my garden from another angle.

I feel these special bird nests are symbolic of new beginnings, life, good fortune, and more. I count my blessings that there are so many of them. When I recently hung a European coat rack, I knew that was the perfect spot for my bird nest collection. Nature is by far the best decorator.

Please share if you collect bird nests. Please share the best bird nest you have found.

Elegant Roses Create an Elegant Holiday Table

For those of you with limited dining table space who need a floral arrangement which is not too overwhelming in stature and height, try this floral arrangement which compacts rose heads. I've seen this type of floral arrangement in flower shops in Europe, and sometimes in dazzling floral demonstrations. It can be done for any occasion, and in any color. It is a design concept, which can inspire you to create an arrangement of your own.

I have an antique dining table which is very long and narrow. I love our table, but it is always a little challenging to get candles, place settings, and sometimes flowers squeezed in. I did this arrangement for our Christmas dinner, and it worked out well.

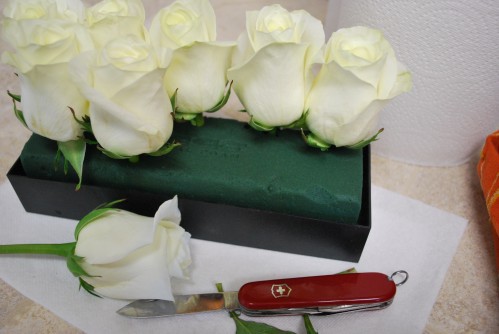
This floral arrangement starts with a table oasis which you can readily find at floral supply stores. The oasis is soaked in water as usual, and then placed in a plastic form box which keeps your tablecloth and table dry. I choose white roses, but you can choose any color rose which compliments your particular theme.

Start with fresh roses, and cut them at an angle to about 3-4" in length. Line them up, shoulder to shoulder in your oasis. Remember that your roses will continue to open up, and expand in your floral arrangement. Creating this arrangement 2 days ahead allows the roses to open more, and fill in the arrangement with a mass look.

For greenery, I clipped foliage from my garden. I found green boxwood, feathery cypress, chartreuse euonymus tips, and blooming blue rosemary. You might have berries, pods, and other blooming shrubs to use from your garden. Green foliage is placed horizontally in the floral arrangement to hang over sides, cover your oasis, and complete the look.

This arrangement will last longer than usual because the water has less distance to travel to the rose head. Check every few days if your oasis is still moist.

Please share if you create a special floral arrangement for your holiday table. Please share if you are familiar with this type of floral arrangement.

Meet Kathryn, An Extraordinary Seamstress of the Garden Kind

I want to share with you some of the exceptional places that I come across from time to time. These places are gems and not to be missed if you are in the area, or they could even be a destination. Most have a “garden thread” to them. “Places To Know” can be retail, restaurants, nurseries, and other. Whatever the place, expect the unusual.

Meet Kathryn, owner of Kathryn Originals, at the Saturday Vista Farmers Market in North San Diego County. She creates magical blouses, jackets, skirts, aprons, and more out of beautiful vintage fabrics. Original vintage fabrics that were once tablecloths, drapes, embroidered linens, and chenille bedspreads are transformed by her sewing artistry, into a beautiful piece of clothing.

Each of her pieces  are unique. She sews amazing clothing details, using thread colors, quilt-like fabric combinations, and vintage buttons. She carries all sizes, and styles. Her designs are perfect gifts for the gardeners in your life, year-round, and for the holidays.

If you can't make the Saturday morning Vista Farmers Market, Kathryn has her designs and creations available online, too, Kathryn's Originals, (tel) (760) 643-1127. Her line of original clothing made from vintage natural fabrics are all works of art in themselves. Stop by and see Kathryn, and tell her VintageGardenGal sent you.


Garden Trug at the Buffet Table

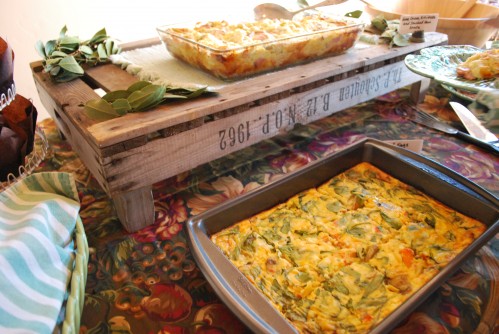
Garden Trug Re-Purposed For Buffet Table Look  for all of your tucked away garden trugs,  and use them for entertaining, like this one re-purposed for a fall buffet.

A vintage garden trug, dated 1962, and purchased at a flea market a few years ago, adds "oohs" and "aahs" when guests start serving themselves to a little morning brunch. Turned upside down, and strategically placed on the table, this trug gives a special occasion dish added height, interest and character. Clipped branches of bay laurel leaves garnish the corners.

Garden trugs are traditionally a shallow basket usually made out of strips of wood, intended to hold cut flowers or fresh produce. They can be re-purposed for many uses, from garden to home.

Goat Cheese, Smoked Ham, and Artichoke StrataBon Appetit 1997, is the dish highlighted on the vintage trug. This recipe is supreme for any special occasion from Christmas morning to Easter Brunch. This recipe is a favorite among my garden friends, and my first introduction to it.

It requires quite a few different ingredients, and time assembling, but well worth it at the first bite. To help a hostess further,  it can be made a day ahead and chilled. For vegetarians, smoked ham can be replaced with fresh spinach.

Please share how you use your garden trugs. Please comment on your favorite trug.


VintageGardenGal Tidbit Thyme....

Timber Press has a new book out,  Concrete Garden Projects. This book offers up an inspiring array of creative projects that can be made for next to nothing. Follow the easy, step-by-step instructions to make containers of all sizes, benches and stools, ponds and birdbaths, pavers and stepping stones — and even a barbecue.

Celebrating the release of Concrete Garden Projects, Timber Press is hosting a two-week long giveaway from October 11-21, 2011, where entrants can win a copy of the book, a $25 gift certificate to Home Depot, and a set of molds. Readers can enter by submitting their email address at, Concrete Garden Projects. Good luck!